You must have seen timelines displaying important events or the history of the company while visiting different sites. Timeline provides a better understanding of the content and helps to stay on track.
There are two types of timeline layouts in Timeline Block Pro. In this article, I will show you how you can easily create a horizontal timeline in the Gutenberg block editor.
Why Horizontal Timeline?
The Horizontal Timeline Layout is an excellent way to showcase a company’s history, roadmap, or significant milestones. It presents your stories in a clear left-to-right format, making it perfect for displaying chronological events.
It efficiently uses horizontal space, which is ideal for wide screens and documents with limited vertical space. This layout makes the timeline more readable and visually appealing.
Step-by-Step Guide To Create Horizontal Timeline
- First, install and activate Timeline Block Pro by Cool Plugins.
- Go to pages, add a new page or edit an existing one.
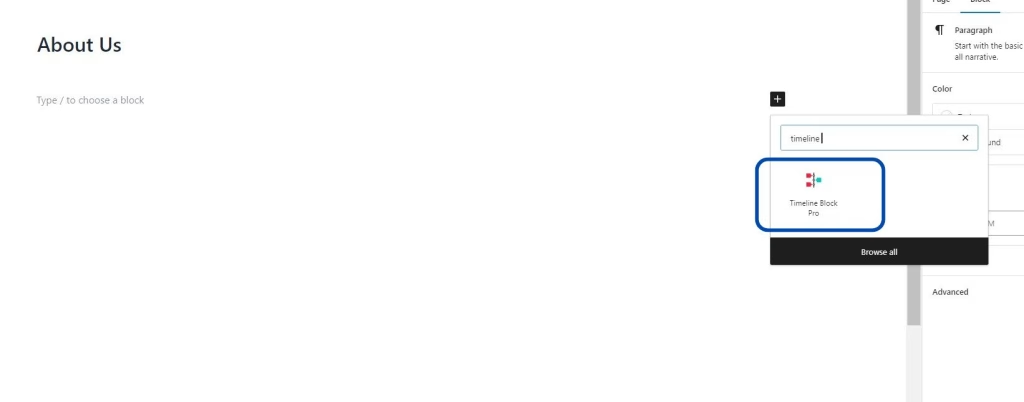
- Now click on the “+” icon and search for Timeline Block Pro, click on that. Default blocks with dummy content will be added to the page, from general settings select “Horizontal layout“.
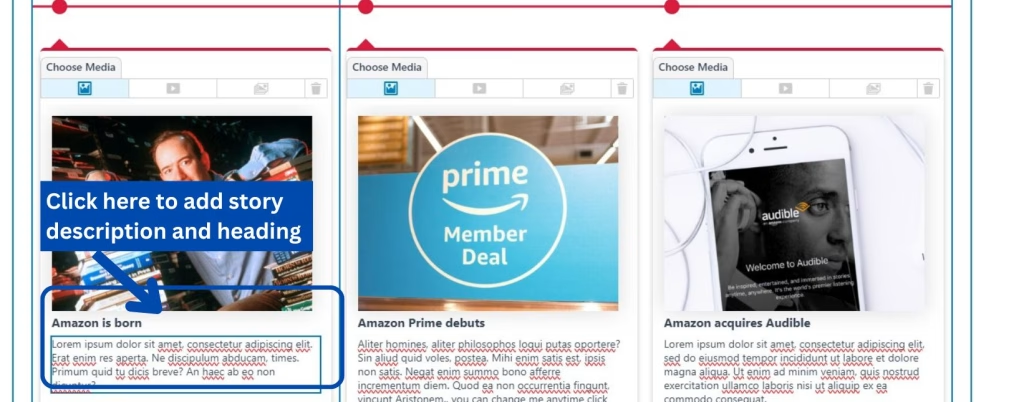
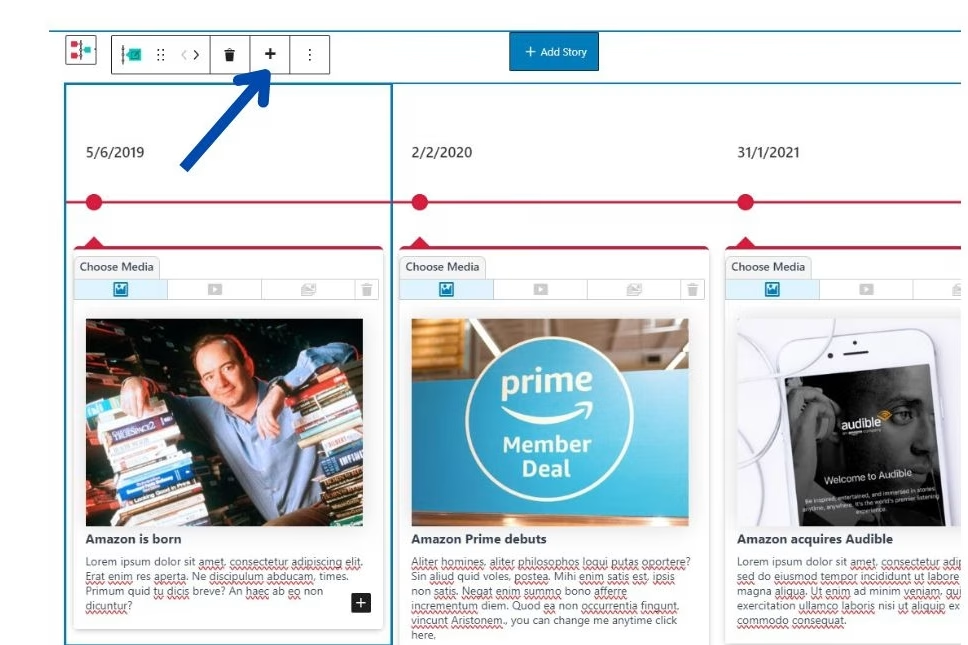
- You can easily edit and add the story description and heading just by clicking on the block. Similarly, edit the date.
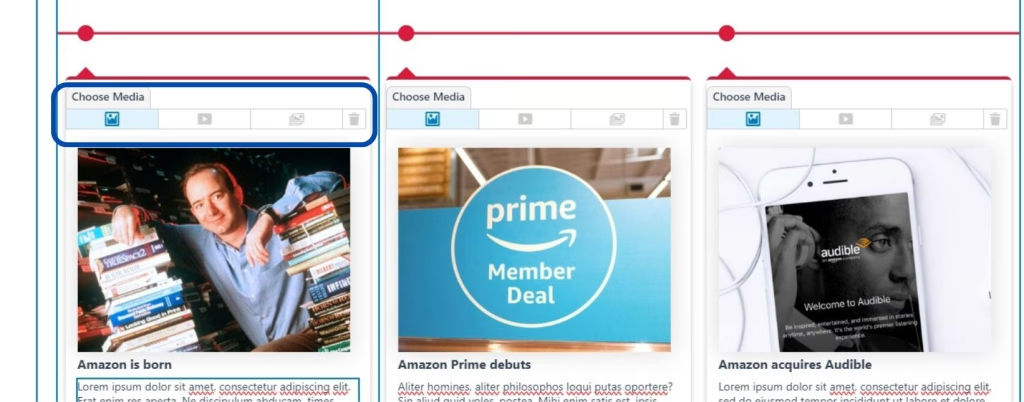
- There are multiple media selection options in the pro version, you can embed “YouTube videos” by simply pasting the link, and Click on the image to replace it with a new one.
If you want to include multiple images in a single story, Click on the “slideshow” option and select more than one image to include in the story.
- Click on the circle which is the icon box, select the icon, and search for the icon that fits best according to your story.
You can add an image instead of an icon by uploading one from the media library, or enter any text as an icon by selecting the text option.
- There are two ways to add more story blocks, First is simply click on the “add story” button displayed at the top, a new block will appear, and enter the details of the story.
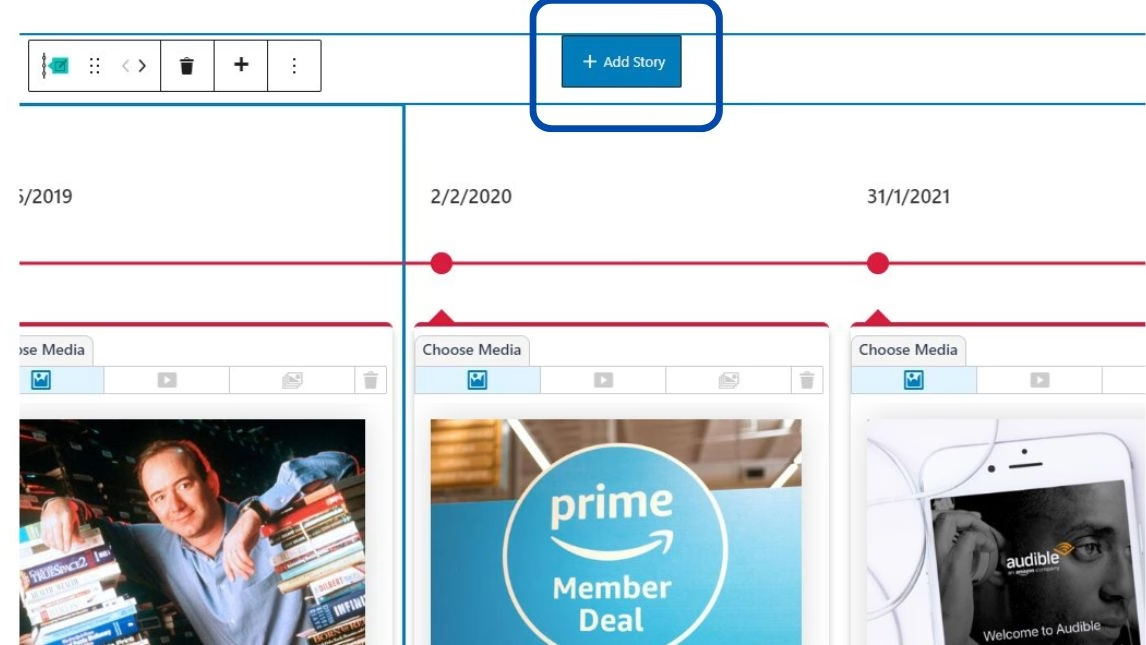
- Using the second way add a story block between existing story blocks, just select any block after which you want to add a new story, click on the “+” icon then a new block will appear.
7. Next, let’s customize these stories to make it fit well as per your website.
- From general settings: Here is the Timeline Design option, set it to Simple to display a single story and default if want to display all three on the current page.
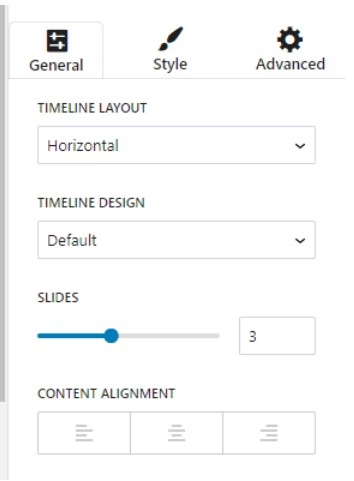
You can select the number of slides you want to appear on the current page.
From “content alignment” change the alignment of story heading and description.
- From Style settings: Change the typography of the story heading, description, and primary labels.

- From Advanced settings: Adjust height, width, and margin of media types, Centerline width, and size of year box
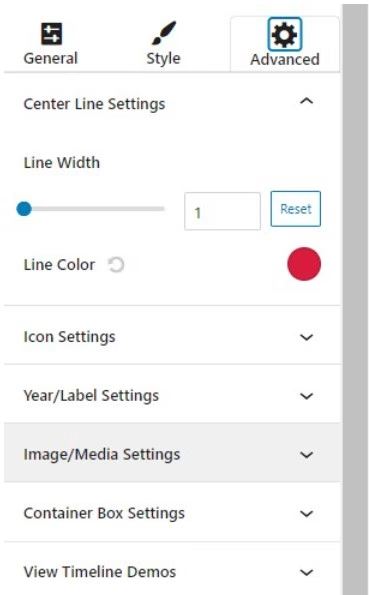
- From the “icon settings” section: Adjust the box size, font size, and box radius of the icon along with the alignment of the icon box by simply dragging the slider.
You also have the option to change the background color of the icon box and the font color of the icon.
8. After making all the necessary changes update the page and check how your story will display.
Create a Timeline in Elementor Pages
Do you prefer using the Elementor page builder? then don’t worry we have a solution for that also, Cool Plugins offers a ‘Timeline Widget for Elementor‘. It has features similar to the Timeline Block Plugin, where you can share your brand story or company’s history with an outstanding timeline design using the advanced Timeline Widget for Elementor.
Final Words
By following this guide, you can easily create a horizontal timeline in WordPress using the Gutenberg block editor. Whether you’re showing historical moments, project plans, or sharing personal achievements, a horizontal timeline can make your content stand out. Start creating your timeline today and bring your ideas to life in this dynamic format. Whether you’re using the Gutenberg block editor or the Elementor page builder, Cool Plugins got you covered with easy-to-use timeline solutions.