
Displaying blog posts in a timeline layout can be a great way to showcase the chronological progression of your content. There are several ways to achieve this, depending on the platform you’re using to host your blog.
Here are some general steps to display your blog posts in a timeline layout:
Choose a timeline plugin
Look for a timeline plugin that’s compatible with your blogging platform. WordPress, for example, has several timeline plugins available, such as Cool Timeline Pro.
Install and activate the plugin
Follow the installation instructions provided by the plugin developer to install and activate the plugin on your website.
Configure the plugin settings
Each timeline plugin will have its own settings to configure. Typically, you’ll need to choose a timeline layout (horizontal or vertical), select the post types to display in the timeline (in this case, blog posts), and customize the appearance of the timeline (e.g., colors, fonts, icons, etc.).
Create Vertical Post Timeline
A vertical post timeline is used to create a story timeline from the existing post, you can easily integrate the timeline of WordPress default posts or custom posts using the below-mentioned methods:
Using shortcodes:
- Just copy the shortcode from the demos and paste it to your page or post.
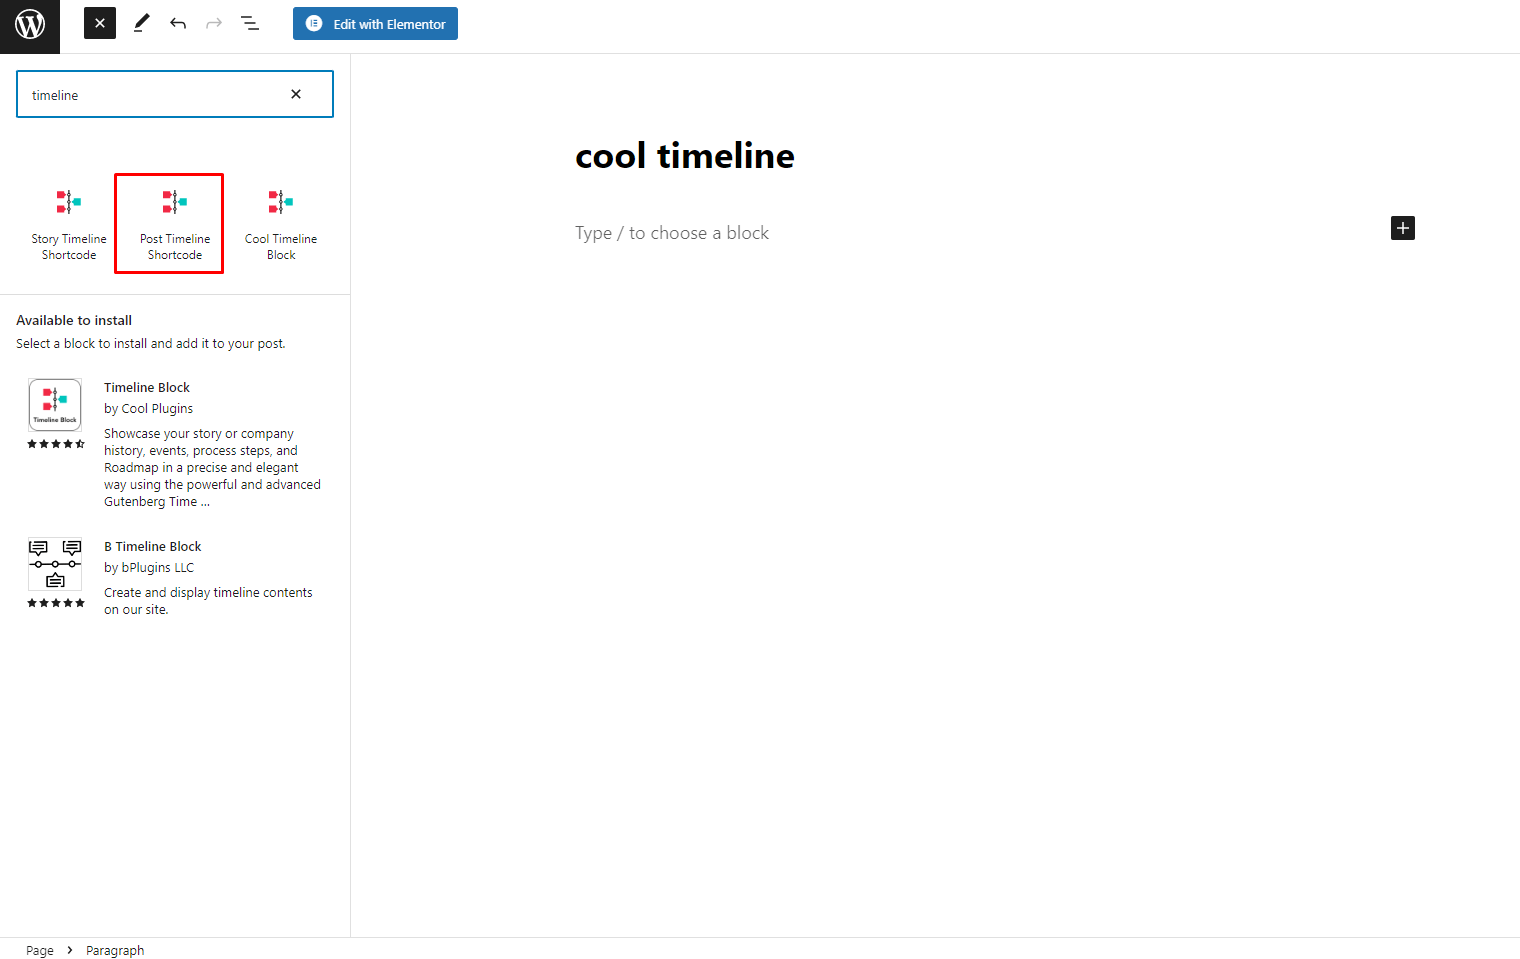
- Search “Timeline Story Block” in the Gutenberg block editor.
- You can use Elementor timeline plugins like “Timeline Widgets Pro” to add a story timeline in Elementor.
You can easily Create Vertical Content Timeline Using Below mentioned Methods
With Gutenberg:
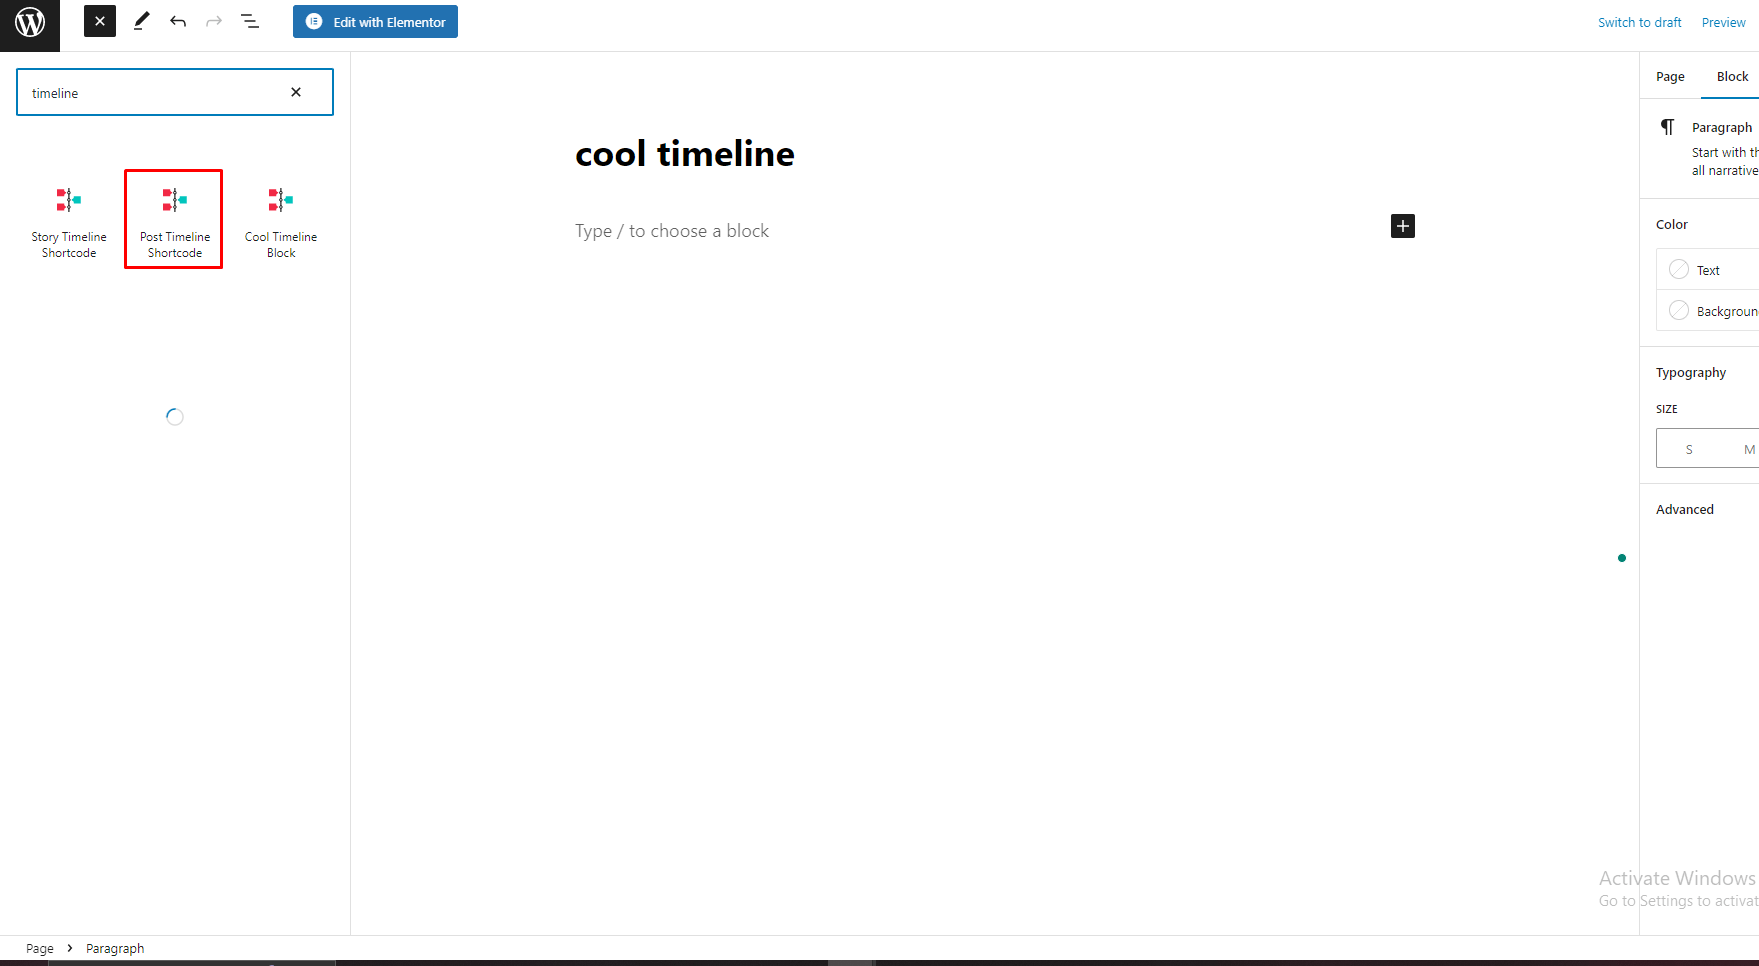
- To create a vertical timeline, go to Pages/Posts >> Add new page/Post >> Search Content Timeline shortcode.
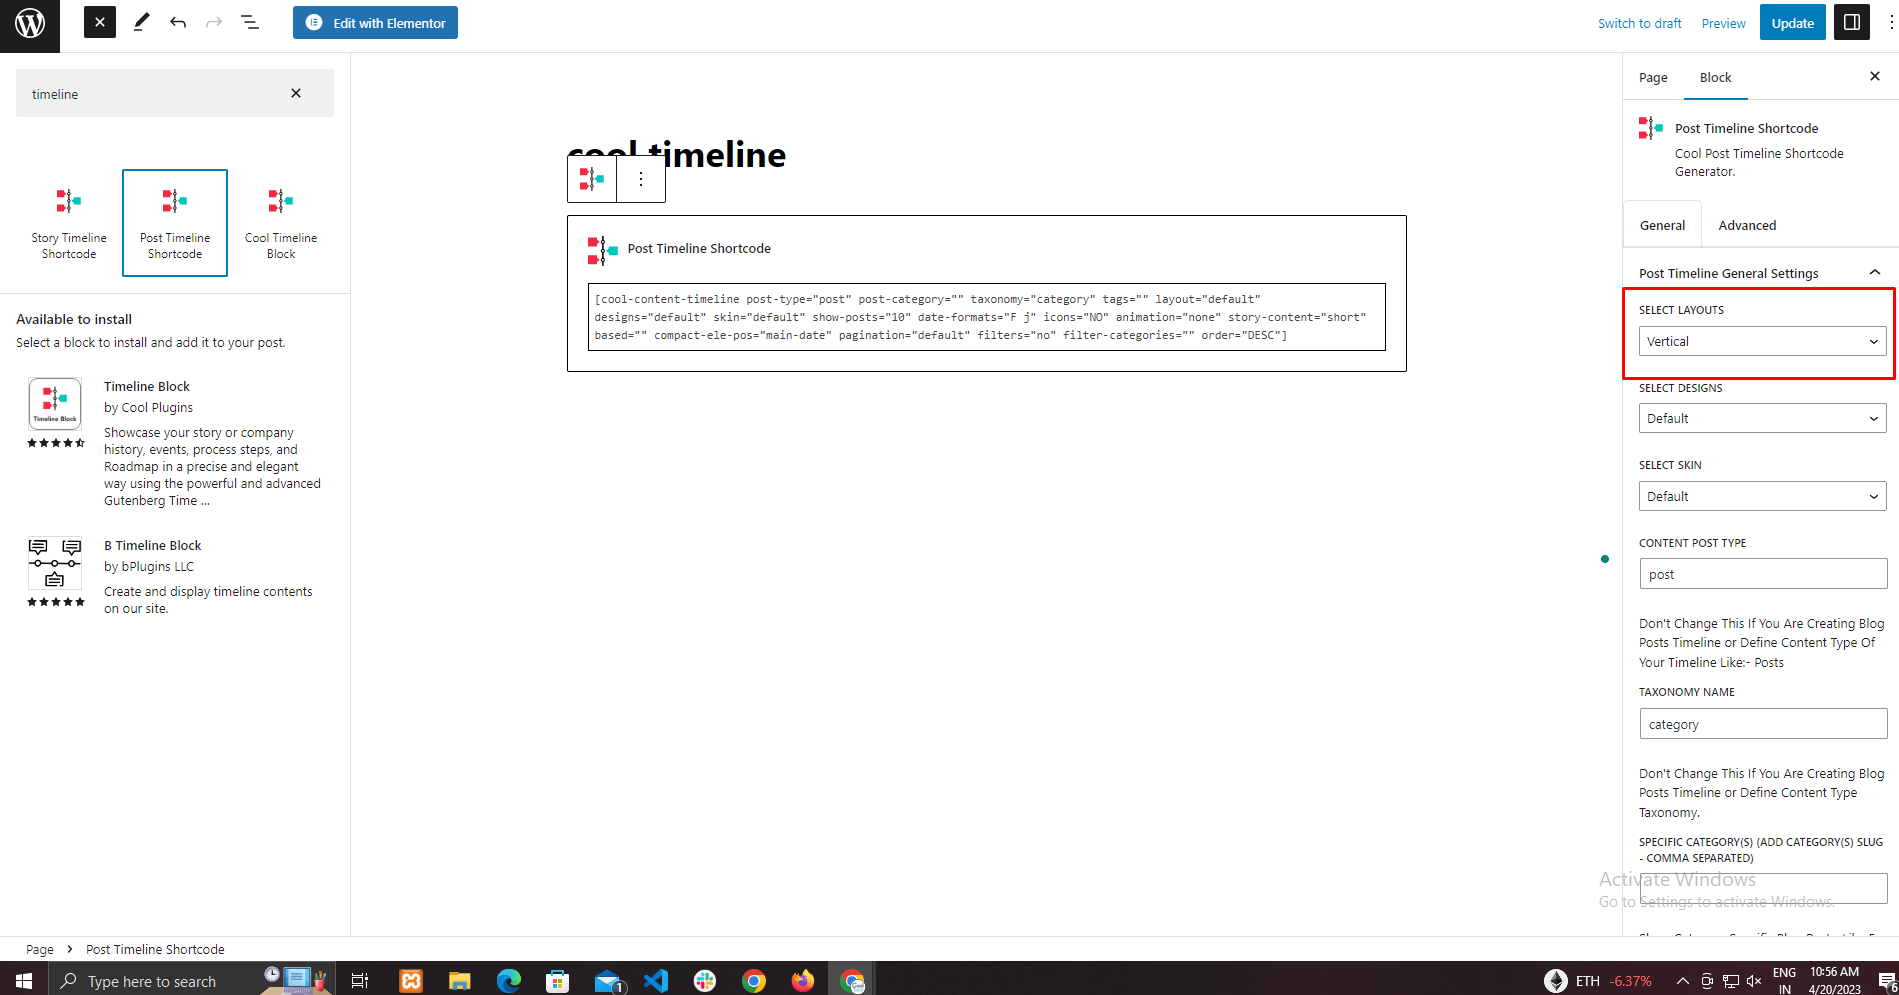
- From the timeline setting on the right menu bar select the layout.
- There are multiple design options to create a vertical layout choose the “Vertical” option.
- Customize the timeline design as needed and Publish the page.
See the below image for a better understanding.
With Default Classic Editor:
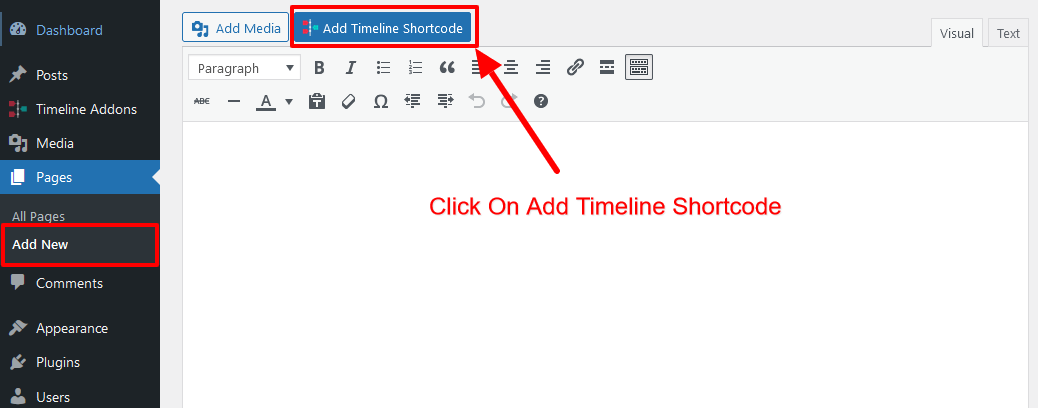
Step 1:
Go to Pages/Post >> Add new page/post >> Click Add Timeline shortcode.
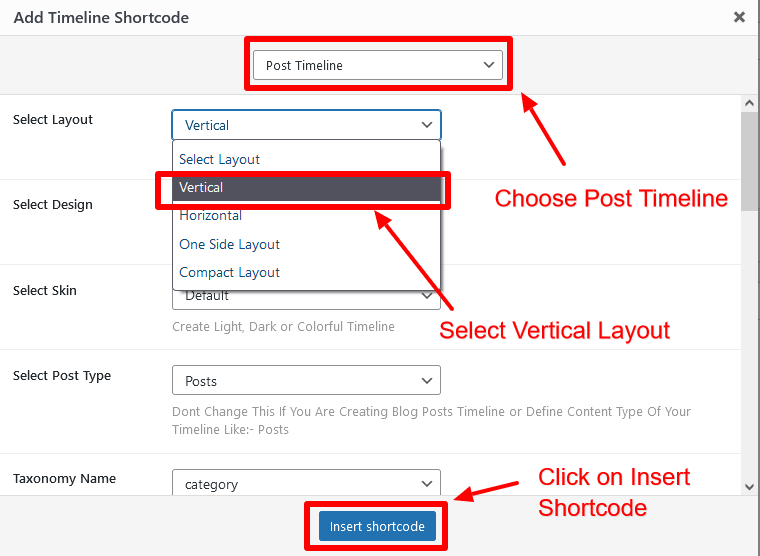
Step 2:
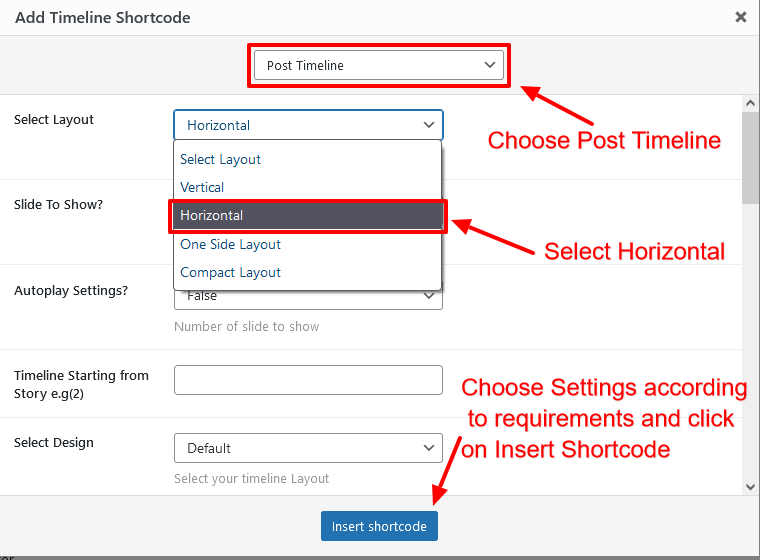
- From the top select box option choose the Post Timeline.
- Click on select layout option and choose the “Vertical” option from the dropdown.
- Select the required settings from the other options and click on Insert Shortcode.
Create Horizontal Post Timeline
Horizontal content timeline used to create story timeline from the existing post, you can easily integrate Timeline of WordPress default posts or custom posts using the below-mentioned methods:
To create a vertical timeline, go to Pages/Post >> Add new page/Post >> Choose Content timeline shortcode.
From the timeline setting on the right menu bar choose the layout for the timeline.
There are multiple layout options to create a vertical layout choose the “Horizontal” option.
Change shortcode setting using Gutenberg.

Add Shortcode With Default Classic Editor:
Step 1:
To create a Vertical Content Timeline, go to Pages/Post >> Add new page/Post >> Click on Add Timeline Shortcode.
Step 2:
From the Top select box option choose the Post Timeline.
Click on select layout option and choose the Horizontal option from the dropdown.
Select the required settings from the options and click on insert shortcode.
Preview and publish the timeline
Preview the timeline to ensure that it displays your blog posts correctly and looks the way you want it to. If everything looks good, publish the timeline on your website.
Depending on the timeline plugin you choose, the specific steps and options may vary. However, most timeline plugins will provide detailed documentation and support to help you set up and customize your timeline.