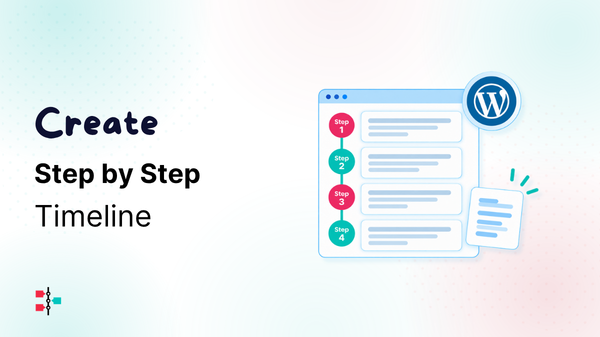
When you have a process to explain on your WordPress website, a long list of text is not always the best option.
For example, you may want to explain how to install a product, how your service works, how a customer completes an order, how a project moves from one stage to another, or how to complete a tutorial.
In such cases, a Step by Step Timeline can make the information much easier to understand.
Instead of showing all the instructions in one long section, you can divide them into clear steps. Visitors can then follow the process from the first step to the last one.
In this guide, we will see how to create a Step by Step Timeline in WordPress, what layout you should use, and how you can customize it without writing code.
What Is a Step by Step Timeline?
A normal timeline shows events by date, like company history from 2010 to 2025. A step by step timeline is a little different. Here you don’t show dates. You show custom labels like “Step 1”, “Step 2”, “Phase 3” or “Launch”. Each step has its own title, description, and image or icon.
You can use it for:
- Work process of your agency or service
- Software development or project roadmap
- Onboarding steps for new customers
- Tutorial or training steps
- Course or event plan
The main benefit is simple. Visitors understand your process quickly, and they stay longer on your page.
Create a Step by Step Timeline with Cool Timeline Pro
Cool Timeline Pro is a popular WordPress timeline plugin with 20,000+ active installs. You can use custom text instead of date or year. So creating “Step 1, Step 2, Step 3” is very easy. You can see a step by step timeline demo before starting.
Step 1: Install and Activate the Plugin
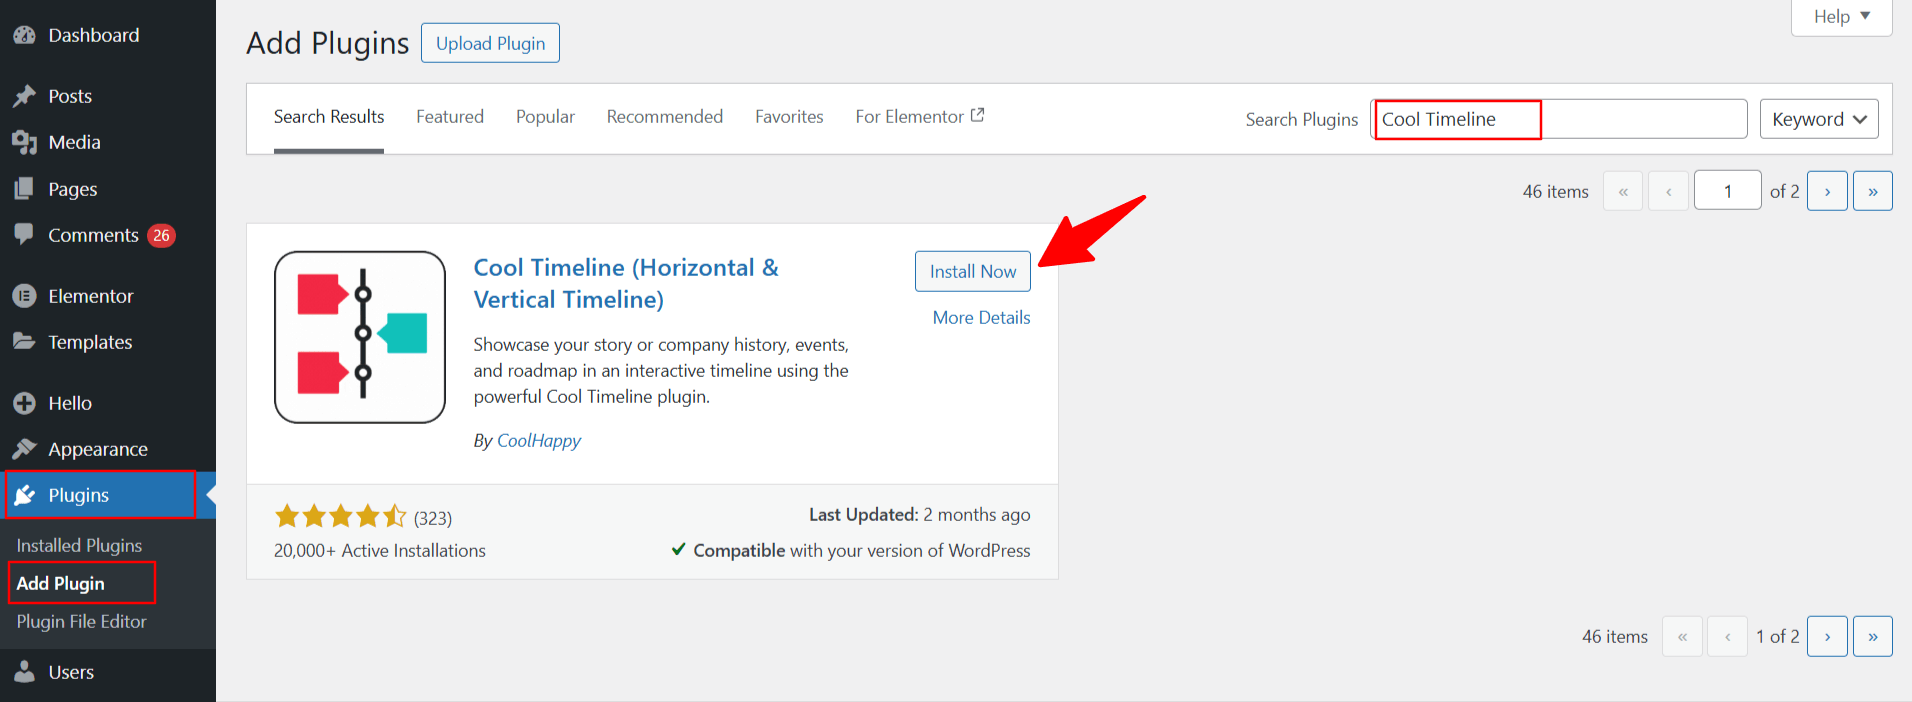
Download the plugin zip file from your account. Then go to Plugins > Add New > Upload Plugin, upload the file, and activate it. Also activate your license key so you get updates and support. If you get stuck anywhere, this installation guide will help you.
Step 2: Add Your Steps as Timeline Stories
In Cool Timeline Pro, every step is created as one “Timeline Story”. So if your process has six steps, you will create six stories.
- Go to Timeline Addons > Add New Story in your WordPress dashboard.
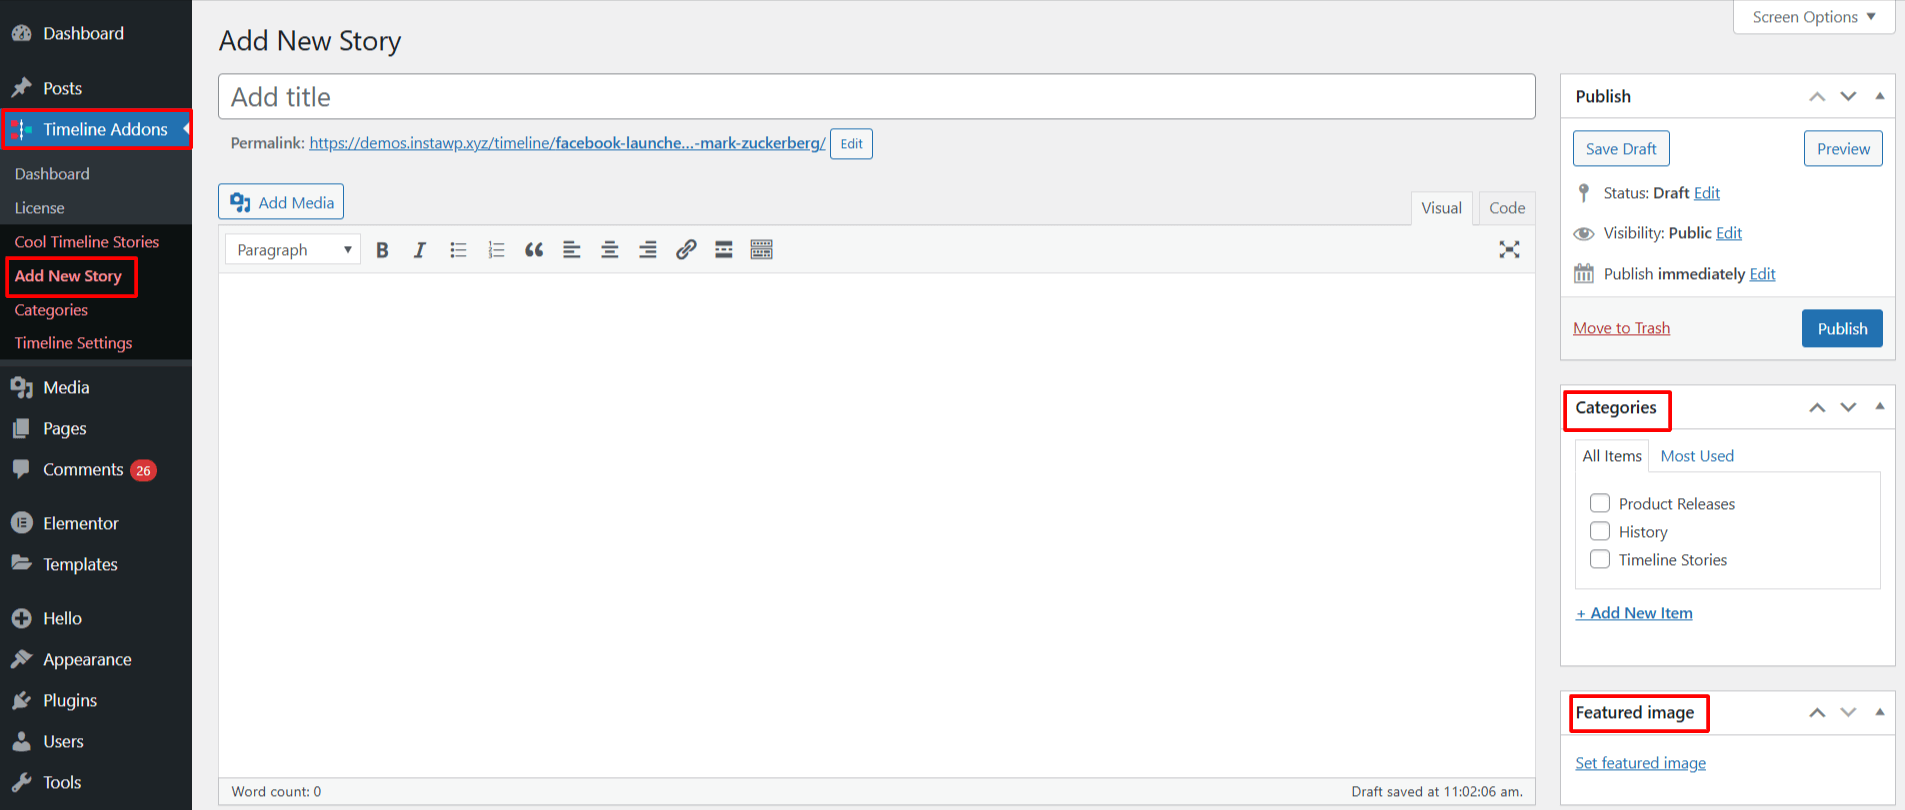
- Write the story title, for example “Share Your Requirement”.
- Add the description. This is the text visitors will see in that step.
- Upload a featured image if you want, and select a category. Categories are useful when you want to make more than one timeline on your site.
Step 3: Choose “Custom Order Based” Story Type
This is the most important part, so please do it carefully. Scroll down to Timeline Story Settings and look at these options:
- Story Type: Select Custom Order Based instead of Date-Based.
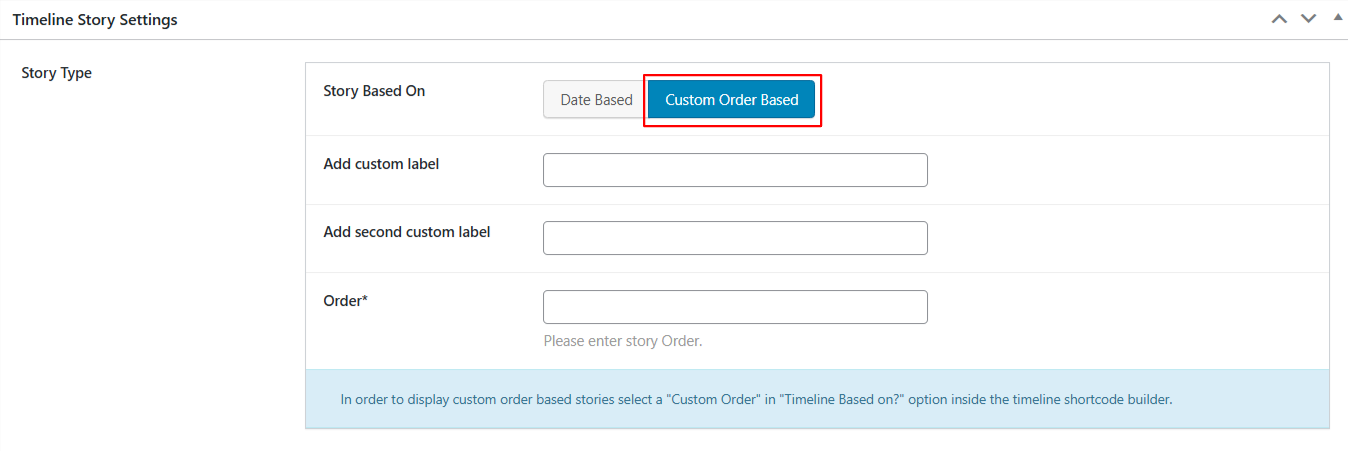
- Custom Label: Write the label you want to show.
- Order Number: Give the number so the steps come in the right order.
- Story Media: Add an image, video or slideshow for that step.
- Story Icon and Extra Settings: Choose an icon type, add a story link, or pick a different colour for the story.
Repeat this for every step, then publish each story. You can read the full details in the Add Timeline Stories guide.
Step 4: Add the Timeline Shortcode to Your Page
Now open the page where you want to show the timeline. You don’t need to add every story manually. The shortcode will pick all your published stories automatically.
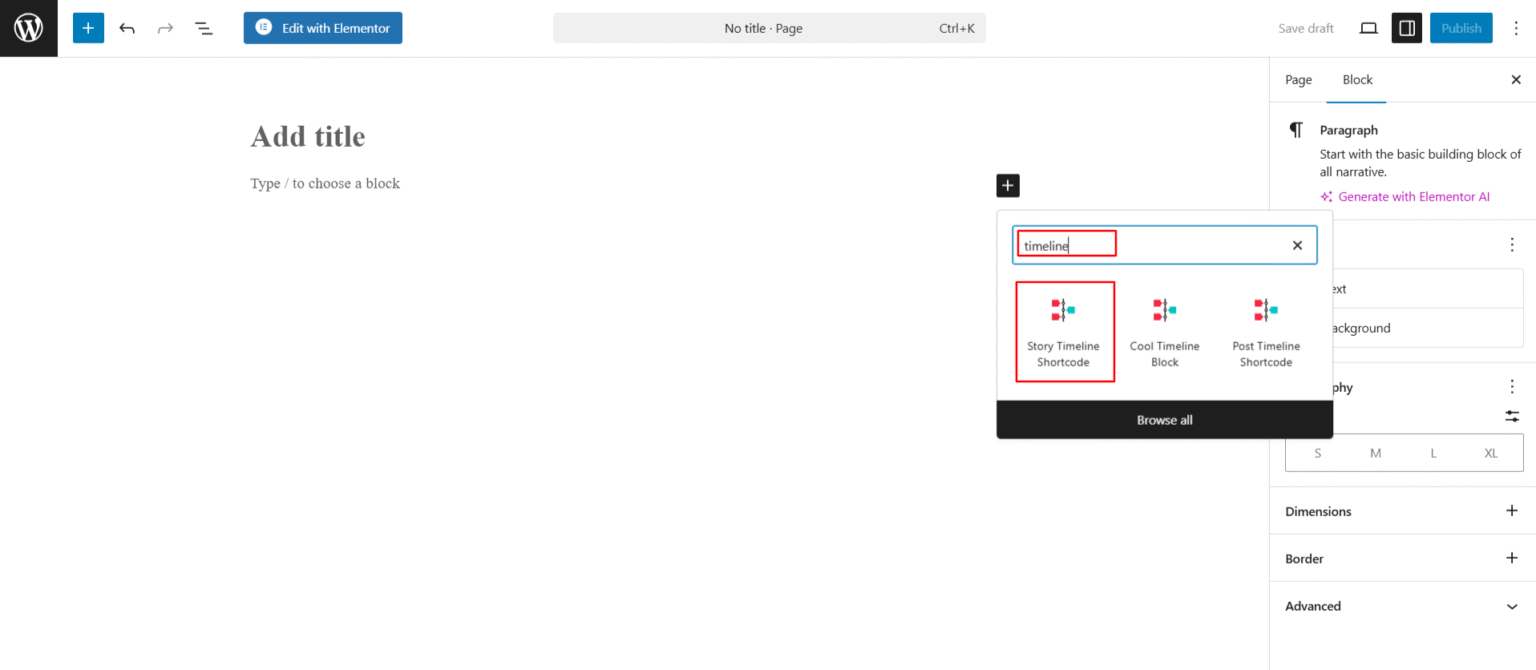
- Open the page in the Gutenberg editor and click the + button.
- Search for Timeline Shortcode and select the Story Timeline Shortcode.
Now set these options in General Settings:
- Select Layouts and Designs: Pick vertical, horizontal or another layout, then choose a design you like.
- Select Skin: Choose default, light or dark.
- Filter Category: Show all stories or only one category.
- Timeline Based On: Select Custom Labels/Text, not Date Based.
- Stories Per Page: Decide how many steps to show at a time.
Then in Advanced Settings, set the story order to ASC so “Step 1” comes first. You can also hide dates, show icons, and add animation effects. For pagination, you can use normal numbered pages or AJAX “Load More”.
Step 5: Publish and Preview
Click Publish and check your page. That’s it. Your step by step timeline is live.
You can copy the same shortcode and paste it in any page builder that supports shortcodes, like Elementor, Divi, Bricks and others.
If you don’t like shortcodes, don’t worry. Cool Timeline Pro also has a Gutenberg Timeline Block. You can add stories directly inside the block editor and style them there. Similarly, if you use Bricks Builder, there is a dedicated Story Timeline element. You can add it from the Bricks editor and design your timeline directly there, without using any shortcode. Another good thing is that the plugin can handle 100+ stories with year navigation and Ajax load more, so your timeline can grow later.
Create a Step by Step Timeline in Elementor with Timeline Widget Pro
If you build your pages with Elementor, then Timeline Widget Pro is the better choice. It is an addon for Elementor with 70,000+ active installs, and it works with both Elementor Free and Elementor Pro. Everything is drag and drop, so no shortcode is needed.
It has a special Process Steps timeline made for exactly this purpose. Here is how to use it.
Step 1: Install Timeline Widget Pro
Upload the plugin zip from your account, activate it, and enter your license key. Make sure Elementor is already active on your website.
Step 2: Add the Widget on Your Page
- Go to Pages and click Edit with Elementor on your page.
- In the widget panel, search for Timeline.
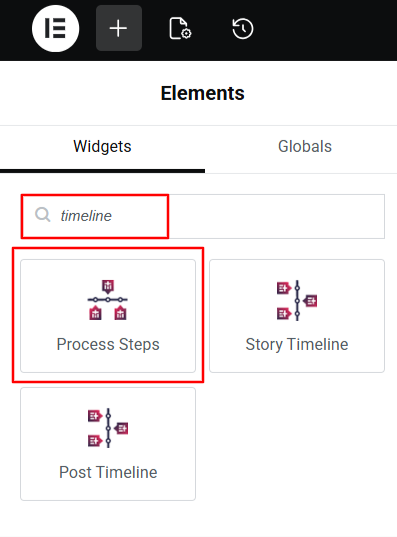
- Drag and drop the Process Steps widget on your page.
A default process steps timeline will appear immediately, so you can just edit it instead of starting from zero.
Step 3: Add Your Steps
Open the Content tab, then go to Process Steps. For each step you can set:
- Badge Text: Write “Step 1”, “Step 2” and so on.
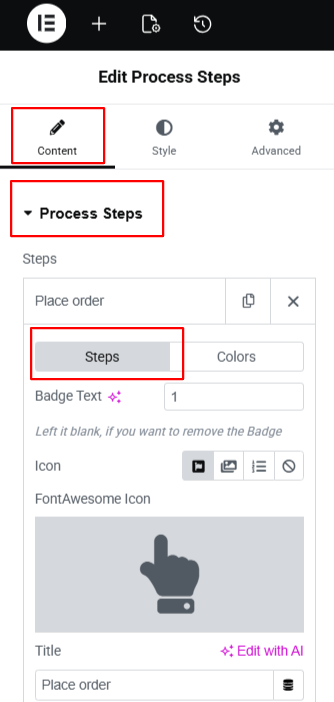
- Icon Type: Choose Icon, Image or Text.
- Title and Description: Explain what happens in this step.
- Title Link: Turn the title into a clickable link if you want to send visitors to another page.
To add another step, click the Add Item button.
Step 4: Choose the Layout
Now go to the Settings section. You will find:
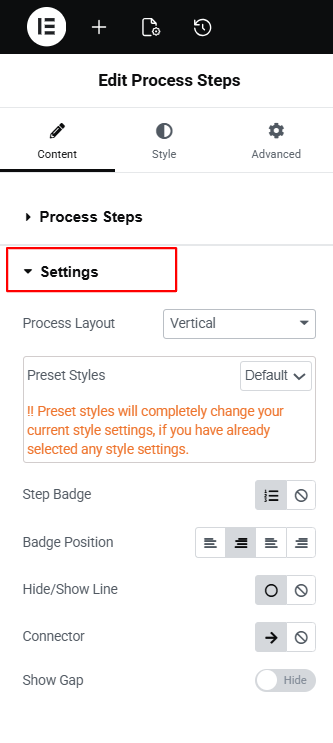
- Process Layout: Vertical, Horizontal or Accordion.
- Preset Styles: Apply a ready-made design in one click. This saves a lot of time.
- Step Badge and Badge Position: Control how the “Step” badge looks.
- Connector, Line and Show Gap: Decide how steps are joined and spaced.
Step 5: Style It and Publish
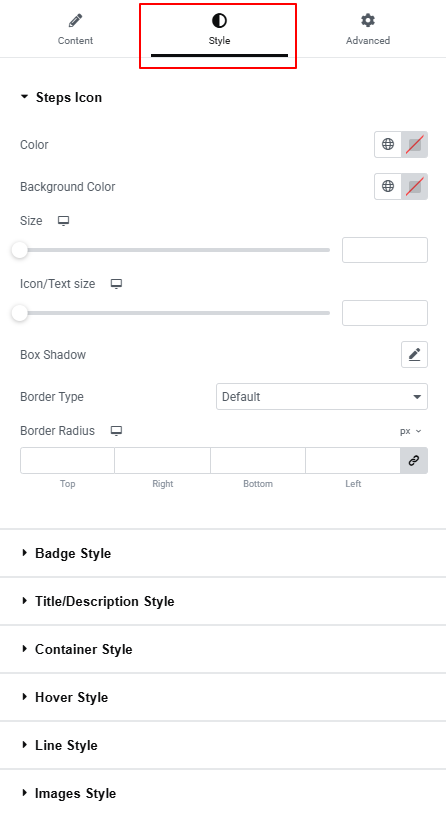
In the Style tab you can change icon size, badge style, fonts, hover effects, line width and image style.
Once you are happy, publish the page and preview it. You can see the process steps timeline demo and the full Process Steps documentation for more details.
Apart from process steps, Timeline Widget Pro also gives a scroll navigation menu, popup story content, different icon and arrow styles, and animation effects. So you can use the same plugin later for company history or product roadmap also.
Which Plugin Should You Choose?
It is very simple:
- Use Cool Timeline Pro if you prefer using a shortcode to add your timeline to different pages and page builders.
- Use Timeline Widget Pro if your website is built with Elementor.
- Using Divi or only the block editor? Then check the Timeline Module for Divi or Timeline Block Pro.
Conclusion
A step by step timeline is one of the easiest ways to explain a process on your website. With Cool Timeline Pro you can create it using stories and a shortcode, and with Timeline Widget Pro you can build it visually inside Elementor. Choose the one that fits your website, follow the steps above, and your timeline will be ready in less than an hour.
Frequently Asked Questions
Should I use a vertical or horizontal layout for my steps?
Vertical layouts work better when each step has a long description or an image, and they are easier to read on mobile. Horizontal layouts suit short steps (a title and one line of text), like a simple 4-step order process, because everything is visible at once.
Where can I use a step by step timeline on my website?
It works well on service pages, “How it works” sections, onboarding or welcome pages, tutorials and documentation, product launch pages, and course or event schedules.
Is a step by step timeline good for mobile users?
Yes, our timeline layouts are fully responsive and adjust automatically to phones and tablets, so your steps stay clear and easy to follow on any screen size.
Can I link each step to another page?
Yes, each step can have its own link, so you can send visitors to a detailed guide or a related page. This keeps the timeline short and still gives more information to those who need it.