A milestone section is a great way to showcase your company’s journey, achievements, and important events on your WordPress website.
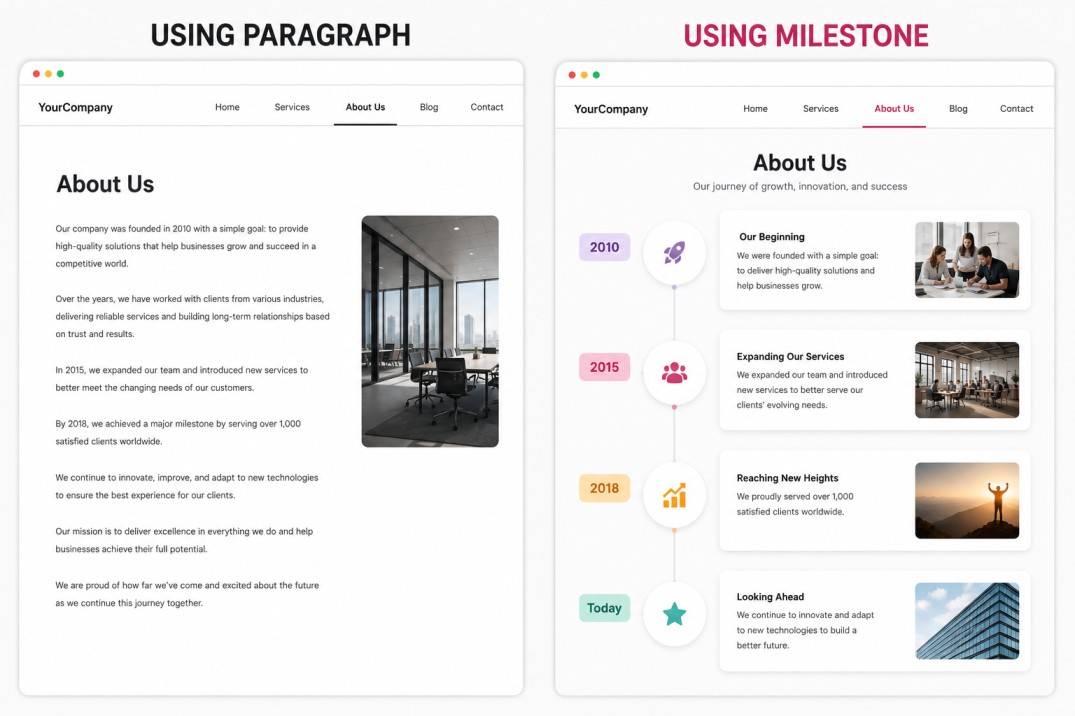
Many websites display their history and achievements on their About Us pages using long paragraphs. These large blocks of text make it difficult for visitors to understand your journey and fail to keep them engaged.
A better way to present your company’s growth and achievements is by using a timeline.
A timeline is a visual way to display events, activities, or information in chronological order. It helps visitors quickly understand your progress, history, and important milestones without reading lengthy text.
There are several WordPress timeline plugins available that make it easy to create milestone sections and present your story in an organized way.
One such plugin is Cool Timeline Pro.
It is a beginner-friendly yet powerful WordPress timeline plugin that not only helps you display milestone sections but also company history, product roadmaps, personal achievements and more in timeline layout.
In this guide, you will learn how to create a milestone section in WordPress using Cool Timeline Pro.
What is Cool Timeline Pro?
Cool Timeline Pro is a powerful WordPress plugin that helps you create visually engaging vertical and horizontal timeline sliders.
With its user-friendly interface, 40+ timeline designs, and flexible customization options, you can easily create timelines that match your website’s style and branding.
Here are some key features of the plugin:
- Multiple layouts and designs: Create beautiful vertical and horizontal timelines in WordPress to present your story, company history, project roadmap, milestones, events, product journey or step-by-step process in a clear chronological layout.
- Timeline Shortcode: Add timelines to pages, posts, landing pages, widget areas, sidebars or custom sections using a shortcode.
- Gutenberg and Classic Editor Support: Create timelines easily using the Gutenberg block or a simple shortcode inside Classic Editor
- Customizable Colors & Fonts: Change colors, fonts, and styles to fit your brand or website design.
- AJAX Load More & Year Navigation: Manage a large timeline with Ajax Load More and pagination.
How to Create a Milestone Section in WordPress
Cool Timeline Pro provides two simple methods to create timeline-based milestone sections:
- Gutenberg Timeline Block: Add and manage timeline stories easily using the built-in block in the WordPress editor. Great for showing steps, events, roadmaps and more.
- Shortcode-Based Classic Timelines: Using the classic editor? Just add a simple shortcode to display your timeline on any page or post and customize it.
Both methods allow you to create and customize timelines easily. Let’s explore each method step-by-step.
Method 1: Gutenberg Block Editor
The Gutenberg Block Editor is the native editor of WordPress. This method offers a visual editing experience, allowing you to create and customize milestone sections without writing any code.
Add the Timeline Block
- Navigate to the pages/post. Create a new page or post or edit the existing one.
- Click on the “+” button in the Gutenberg editor.
- Search for Cool Timeline Block and add it to your page.
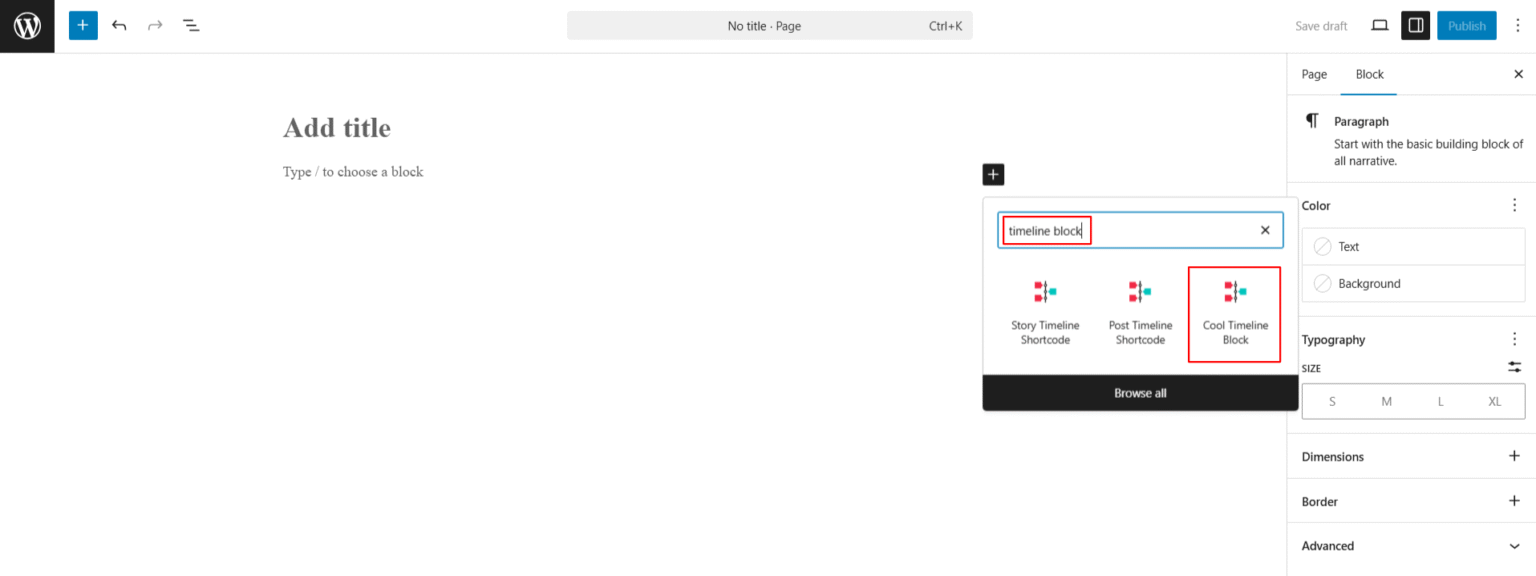
A default timeline layout will appear, which you can customize according to your requirements.
Add Timeline Content
- Click on each timeline item and add content like date and year, label, title, and description.
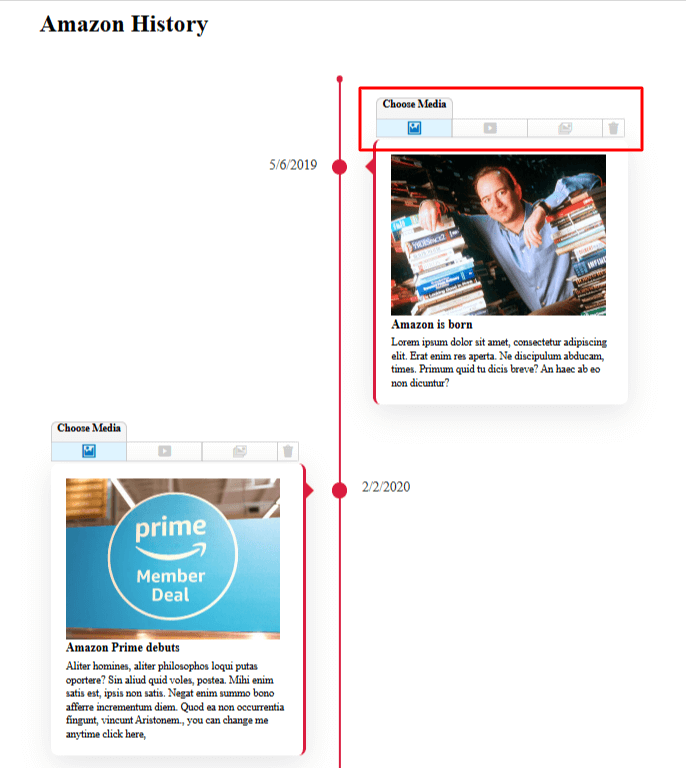
- To embed images, videos, and slideshows within each timeline story, at the top of each story box, you’ll see a “Choose Media” option. This toolbar lets you pick the type of media you want to display.
Customize Single Story Block
If you want to customize a single story block, follow the steps below:
- Click on the story block you want to edit.
- The story settings will open in the right sidebar:
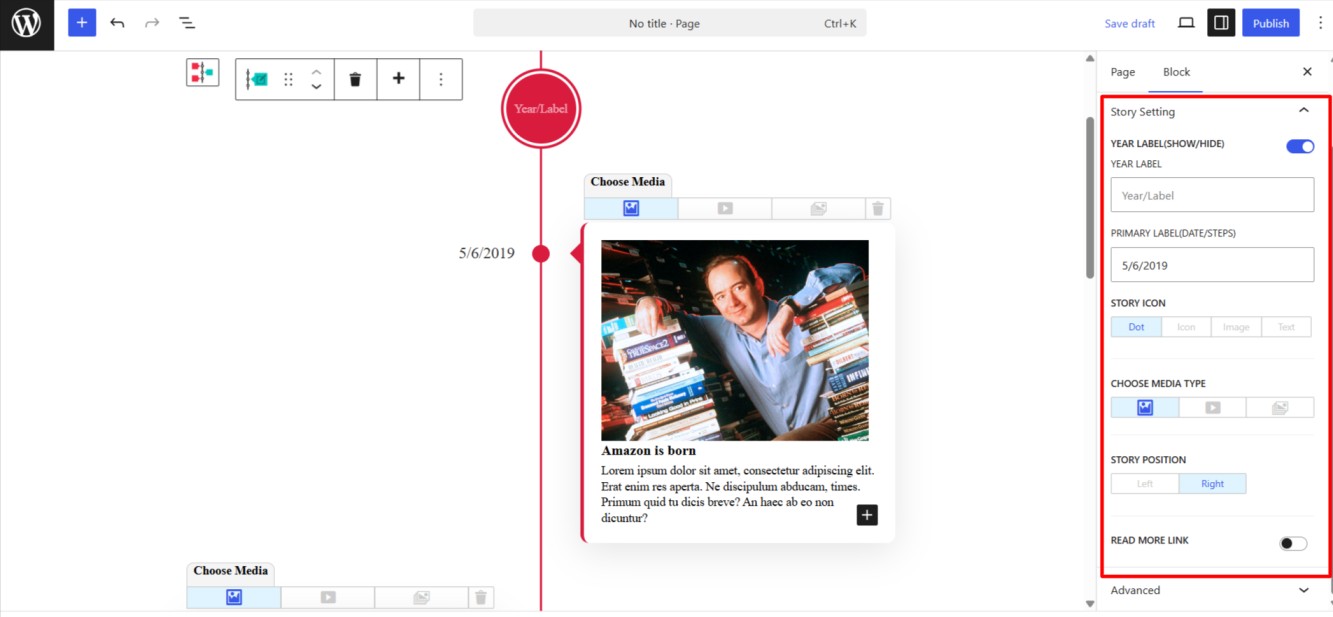
- Year Label (Show/Hide): Enable this option to display a year for the story.
- Year Label Text: After enabling the Year Label, enter the text.
- Primary Label: Set the main date, step, or heading for the story.
- Story Icon: You can add an image, text, icon, or a simple dot for the story icon.
- Story Position: Adjust the position of this story within the vertical layout.
- Read More Link: Enable the “Read More” link if you want to provide extra details or direct users to another page.
- Enter Your Read More Link: After enabling the Read More option, add the URL where users should be taken when they click the link.
Customize Timeline
If you want to apply customization to all story blocks and control how your timeline stories are displayed, then follow the steps below:
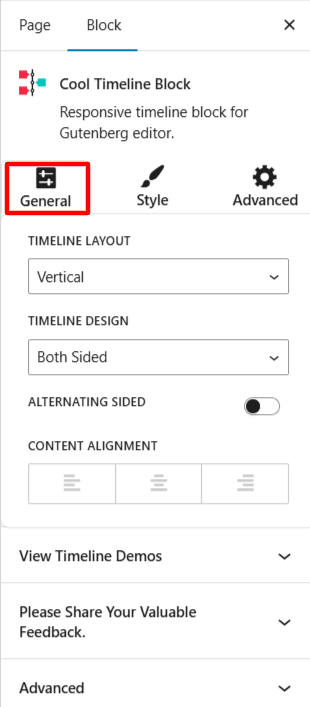
- General: This section controls the overall structure and layout of your timeline. You can customize options such as timeline layout, design style, story position, and content alignment.
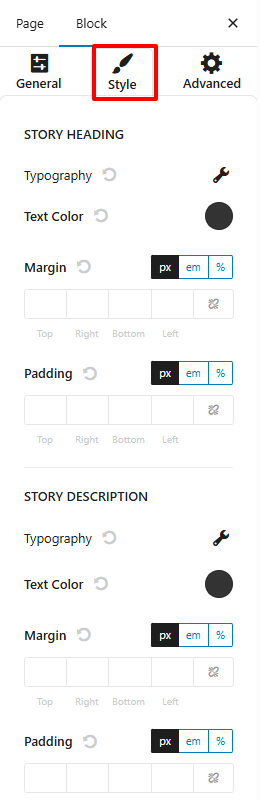
- Style: Adjust typography, text colors, margins, padding, and other styling options for story headings, descriptions, primary labels, and year labels.
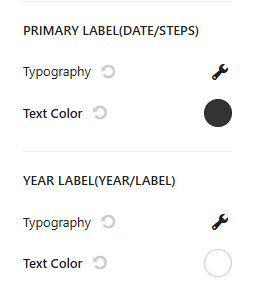
- Advanced: Modify the center line, icons, images/media, container styling, animation effects, and other design options.
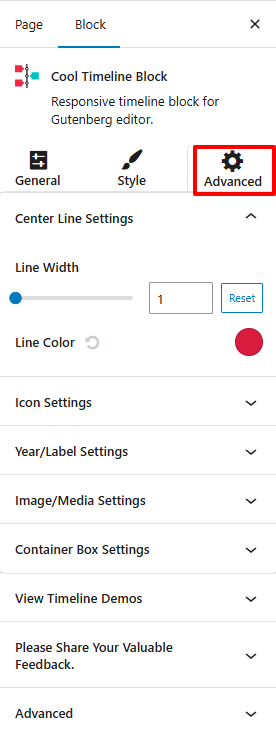
- Once you are satisfied click publish and preview the timeline.
Method 2: Shortcode-Based Classic Timelines
A shortcode is a simple code snippet that you can insert into your WordPress posts, pages, or widgets to display timelines.
With this method, you first have to create timeline stories and then display them anywhere on your website using a shortcode.
Create Timeline Stories
- From your WordPress Dashboard, navigate to Timeline Addon > Add New Story.
- The Classic Editor will open where you can add your timeline story details.
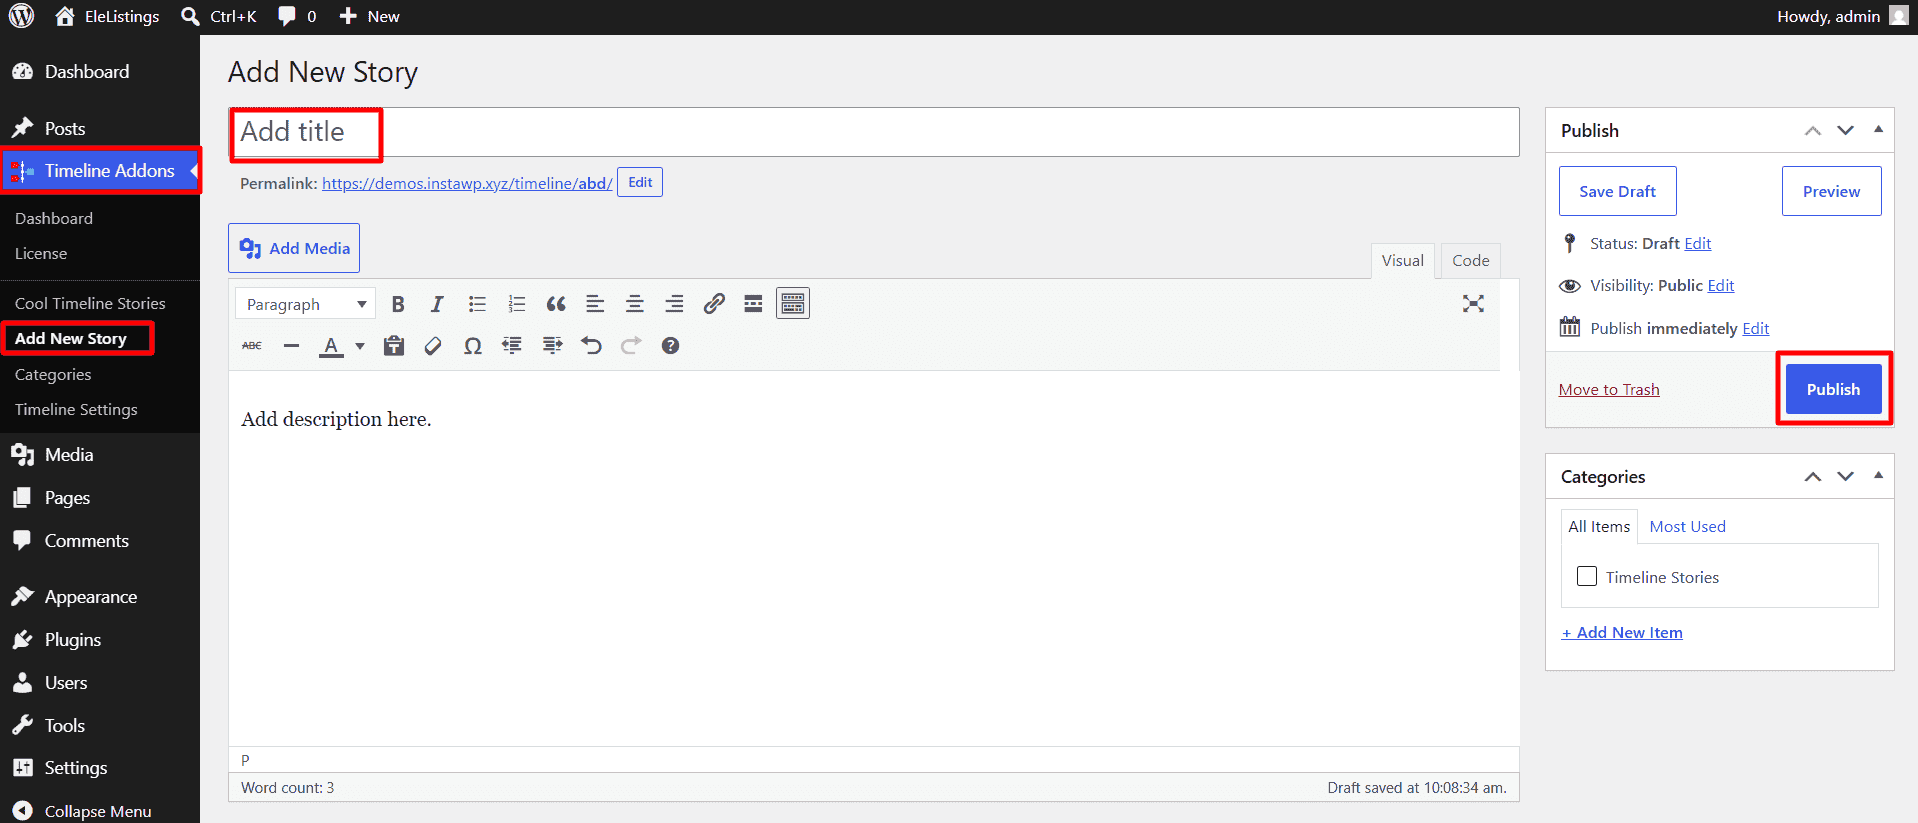
- Enter the Story Title, Description, Icon, Multimedia, and other details.
- Once satisfied with the changes, publish the Story.
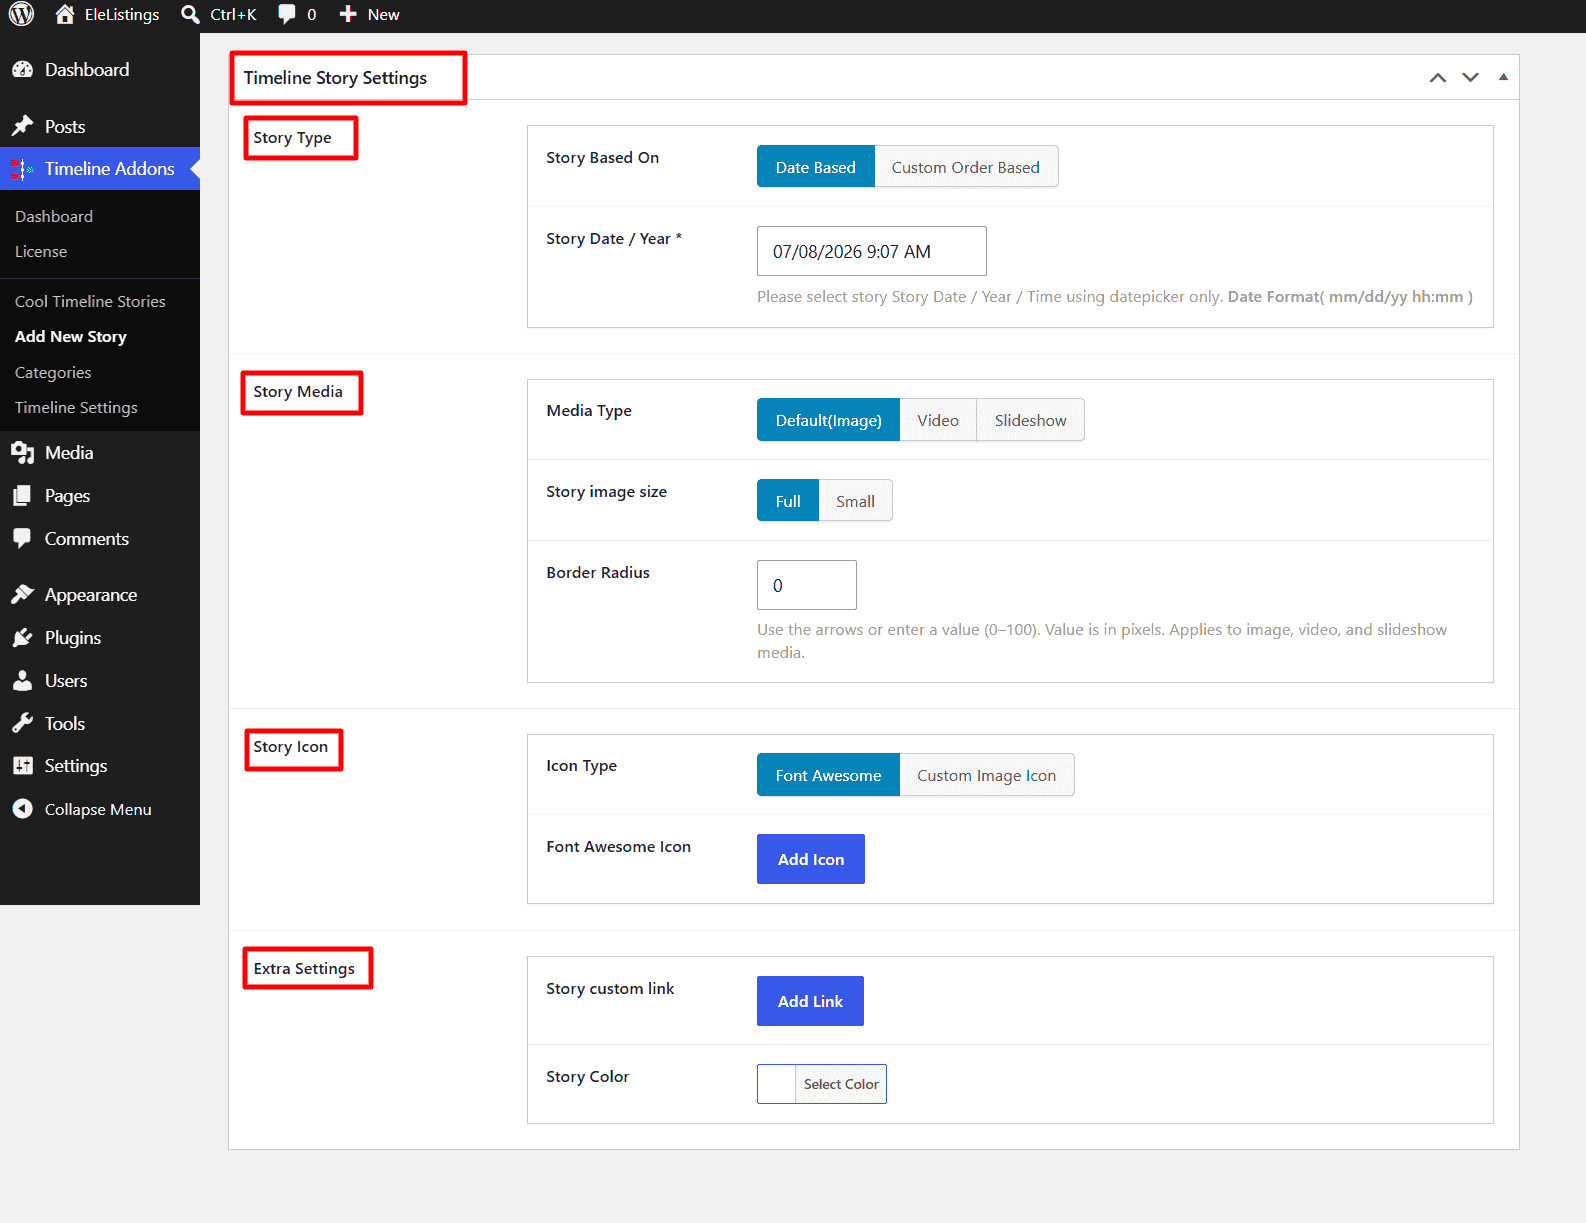
Similarly, add other stories.
Display Timeline Using Shortcode
Once your stories are ready, you can display your timeline anywhere on your website using a shortcode.
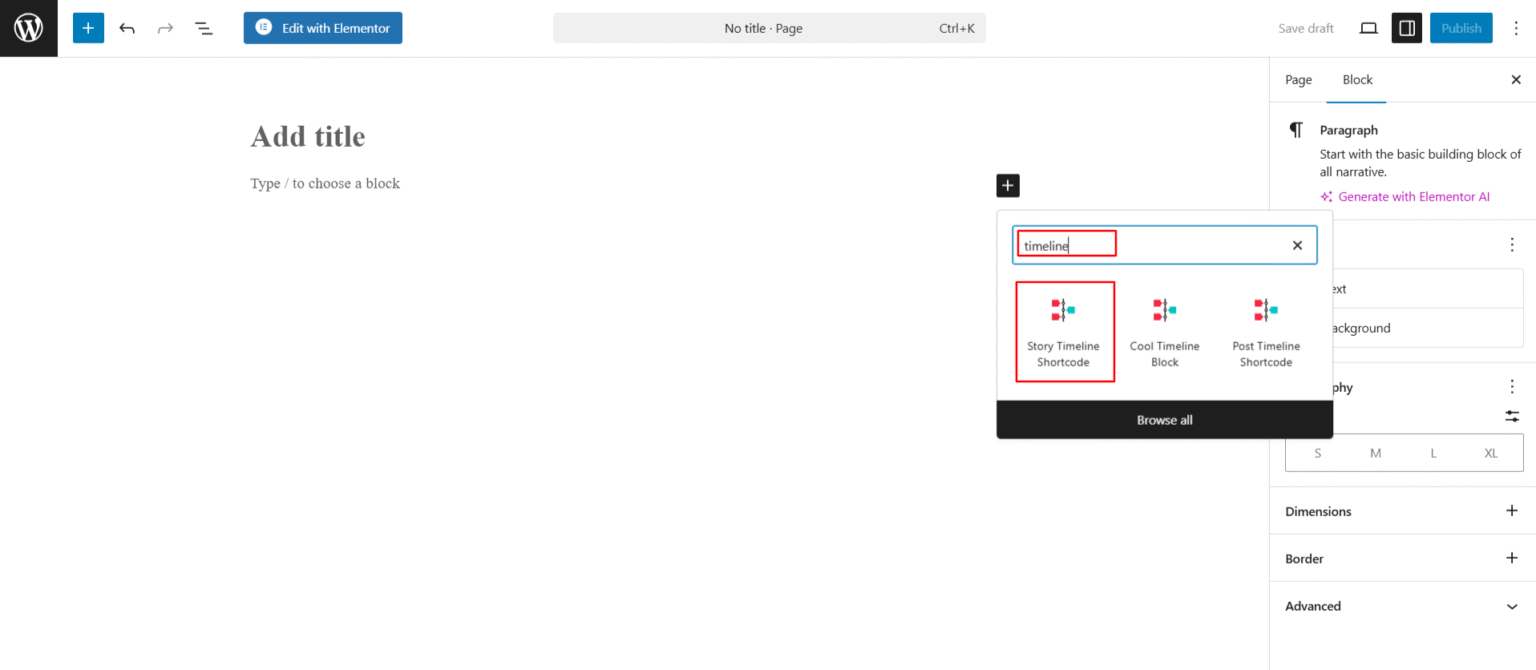
- Open the page or post where you want to display your timeline.
- Add a Shortcode block in the Gutenberg editor or if you are using classic editor click Add Shortcode button.
- Shortcode will be added to your page.
- Click Publish or Update.
Your timeline will now appear on the frontend.
You can also use the shortcode inside Elementor or Divi to display your timeline in different sections of your website.
For a more detailed step-by-step guide to display information via timeline check out our documentation.
Best Practices to Create an Engaging Milestone section:
- Keep milestone descriptions short.
- Use meaningful icons or images.
- Maintain consistent spacing.
- Arrange milestones chronologically.
- Avoid overcrowding.
- Highlight major achievements.
- Optimize for mobile devices.
Conclusion
A milestone section is more than just a design element, it’s an effective way to turn your journey into a clear and engaging story.
A well-designed milestone section helps improve readability, enhances user engagement, and gives your website a more professional storytelling experience.
With Cool Timeline Pro, you can build fully customizable milestone sections using either the Gutenberg Block Editor or shortcodes.
FAQs
What is a milestone section on a website?
A milestone section is a visual section on a website that highlights important events, achievements, or key moments in chronological order. It helps visitors understand your journey, growth, or progress in an engaging way.
Where can I use a milestone section on my website?
Milestone sections are commonly used on About Us pages to showcase company history and achievements. You can also use them for product roadmaps, project timelines, work experience, event histories, and step-by-step processes.
Can I create a milestone section in WordPress without coding?
Yes, you can create a milestone section without writing code by using a WordPress timeline plugin like Cool Timeline Pro. It provides easy-to-use options to create and customize timelines using blocks or shortcodes.
What is Cool Timeline Pro?
Cool Timeline Pro is a premium WordPress timeline plugin that helps you create visually appealing vertical and horizontal timelines. It allows you to display milestones, company history, product journeys, roadmaps, and other important events in a timeline format.
Can I create both vertical and horizontal milestone sections with Cool Timeline Pro?
Yes, Cool Timeline Pro allows you to create both vertical and horizontal timeline layouts with different designs and customization options.
Can I add images and videos to my milestone section?
Yes, you can add images, videos, slideshows and other media to timeline stories to make your milestone section more interactive and visually appealing.