Using the Style Settings in Cool Timeline Pro, you can customize the background colors, line colors, fonts, and other visual elements according to your website.
Follow the steps below:
- From your WordPress dashboard, navigate to Timeline Addons > Timeline Settings > Style settings.
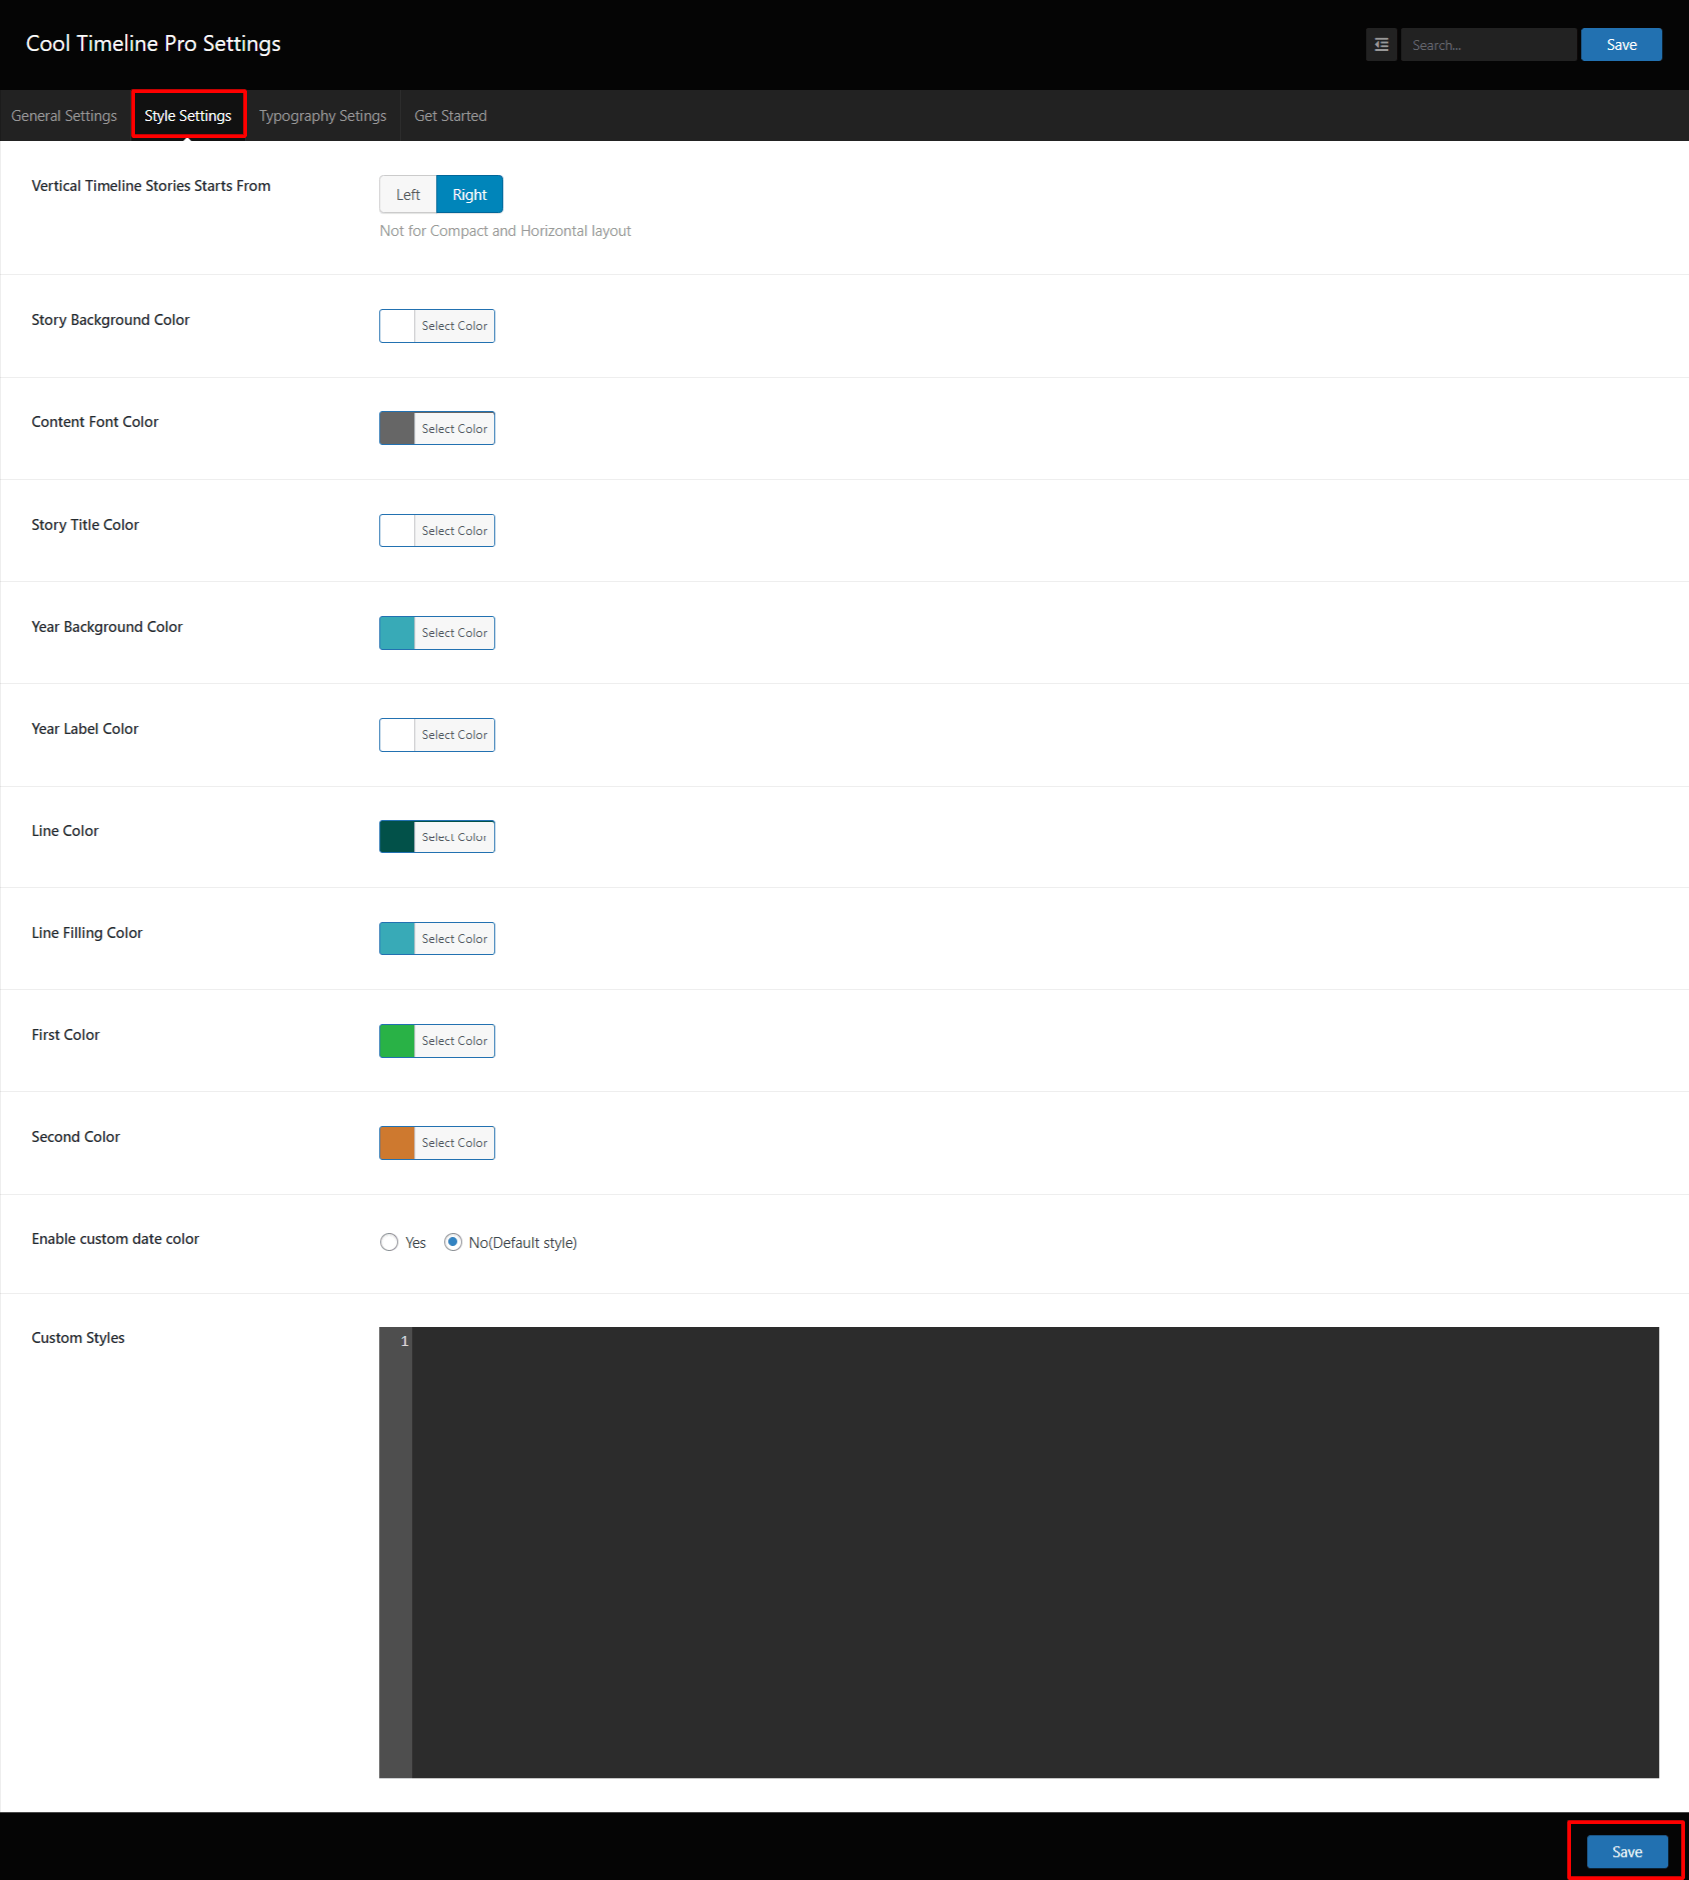
- Stories Start From: Choose where your stories should start, Left or Right side of the page.
- Story Background Color: Set a background color for each story box on your timeline.
- Story Title Color: Change the color of your story titles or headings.
- Content Text Color: Select a color for the story text.
- Image Caption Color: Choose the color for the image caption text.
- Year Background Color: Select a background color for the year label that appears beside or above your stories.
- Year Text Color: Choose a text color for the year or date labels.
- Timeline Line Color: Set the color of the timeline line that connects your stories.
- Timeline Fill Color: Choose a color for the filled section of the timeline line.
- Primary Color / Secondary Color: Pick two colors for your timeline.
- Year Navigation Background Color: Set the background color for the year navigation dropdown.
- Year Navigation Text Color: Set the text color for the year navigation dropdown.
- Year Navigation Active / Hover Color: Set the active color for the year navigation dropdown.
- Custom Date Color: If you want to set your own date color instead of using the default style, choose Yes.
- Pagination & Load More Background Color (Default State): Set the background color for the pagination.
- Pagination & Load More Text Color (Default State): Choose the text color for the pagination.
- Pagination & Load More Background Color (Active State): Set the background color for the pagination.
- Pagination & Load More Text Color (Active State): Choose the text color for the pagination.
- Load More Button Border Radius: Define the border radius of the load more button.
- Custom Styles: Add custom CSS if you want to add custom styles.