If you are using Cool Timeline Pro for the first time, this guide will help you create and publish your first timeline in WordPress.
In Cool Timeline Pro, each event is created as a separate Timeline Story. After creating your stories, you can display them together on any WordPress page using the Story Timeline Shortcode block.
You do not need to manually add every story to the page. Once your Timeline Stories are published, the shortcode will automatically display them based on your selected settings.
The complete process is:
Create Timeline Stories > Add the Timeline Shortcode > Publish the Page
Let’s go through each step.
Pre-requisite
Before creating your first timeline, make sure you have installed and activated Cool Timeline Pro. If you have not installed Cool Timeline Pro yet, first follow our installation guide.
Create Timeline Stories
Follow the steps below to create the first event for your timeline:
Add Story Content
- From your WordPress dashboard, navigate to Timeline Addons > Add New Story.
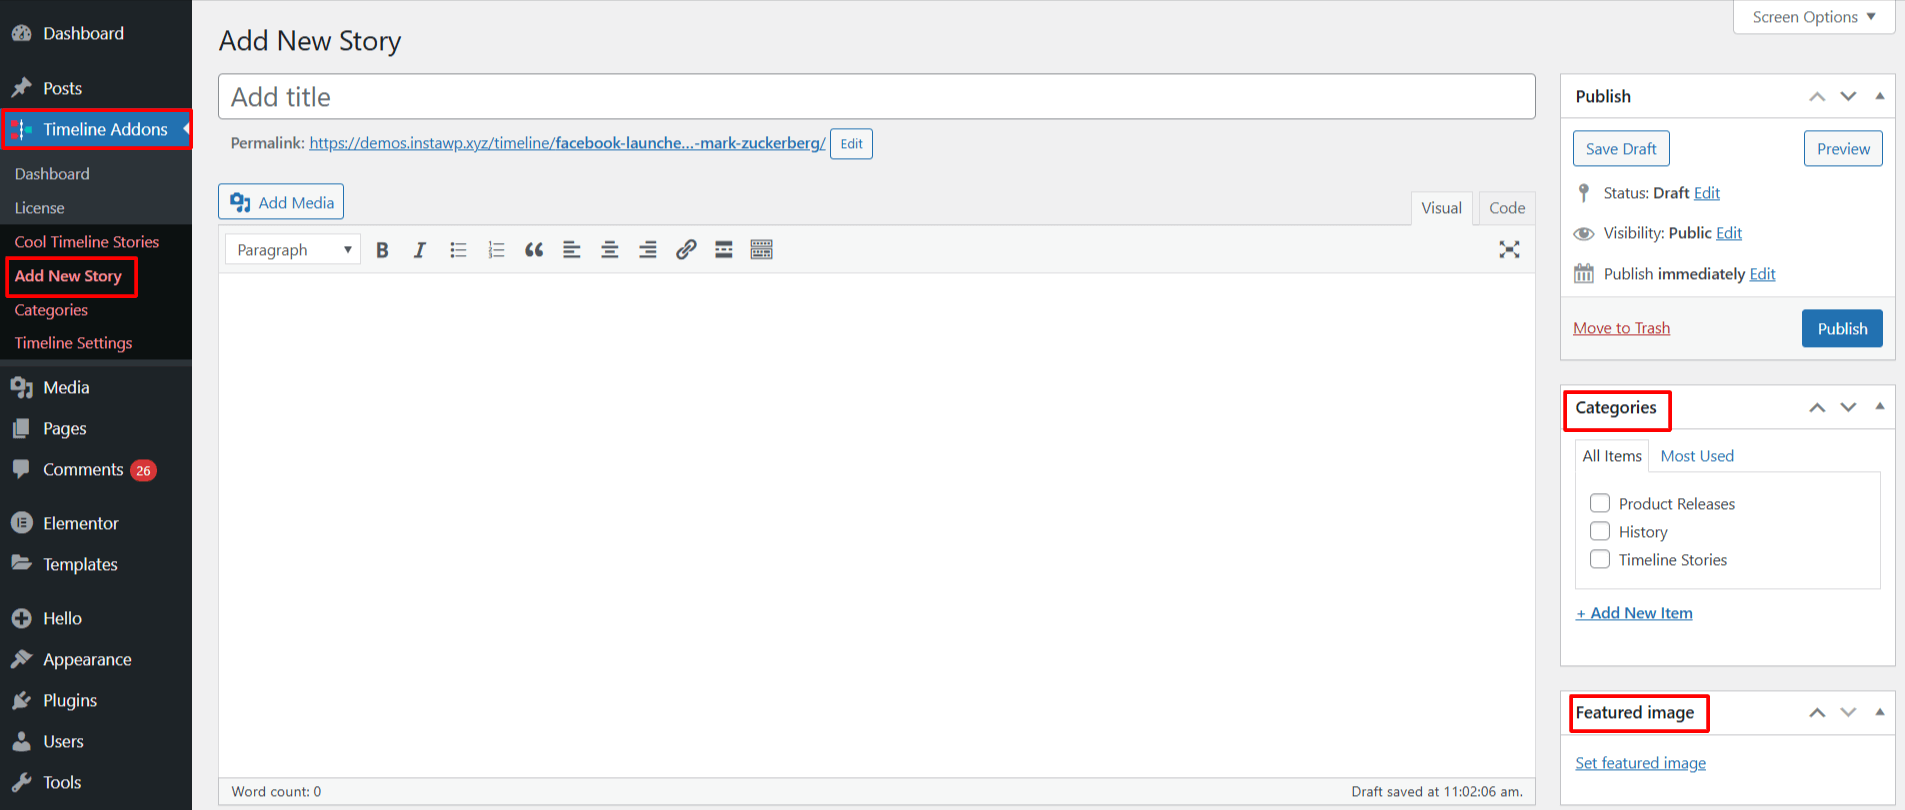
- Enter your Story Title and Description, this is the content that will appear on your timeline.
- Upload a Featured Image that visually represents your story and assign a category to your timeline story. [Create timeline categories]
Timeline Story Settings
From the “Timeline Story Settings,” you can customize your timeline stories:
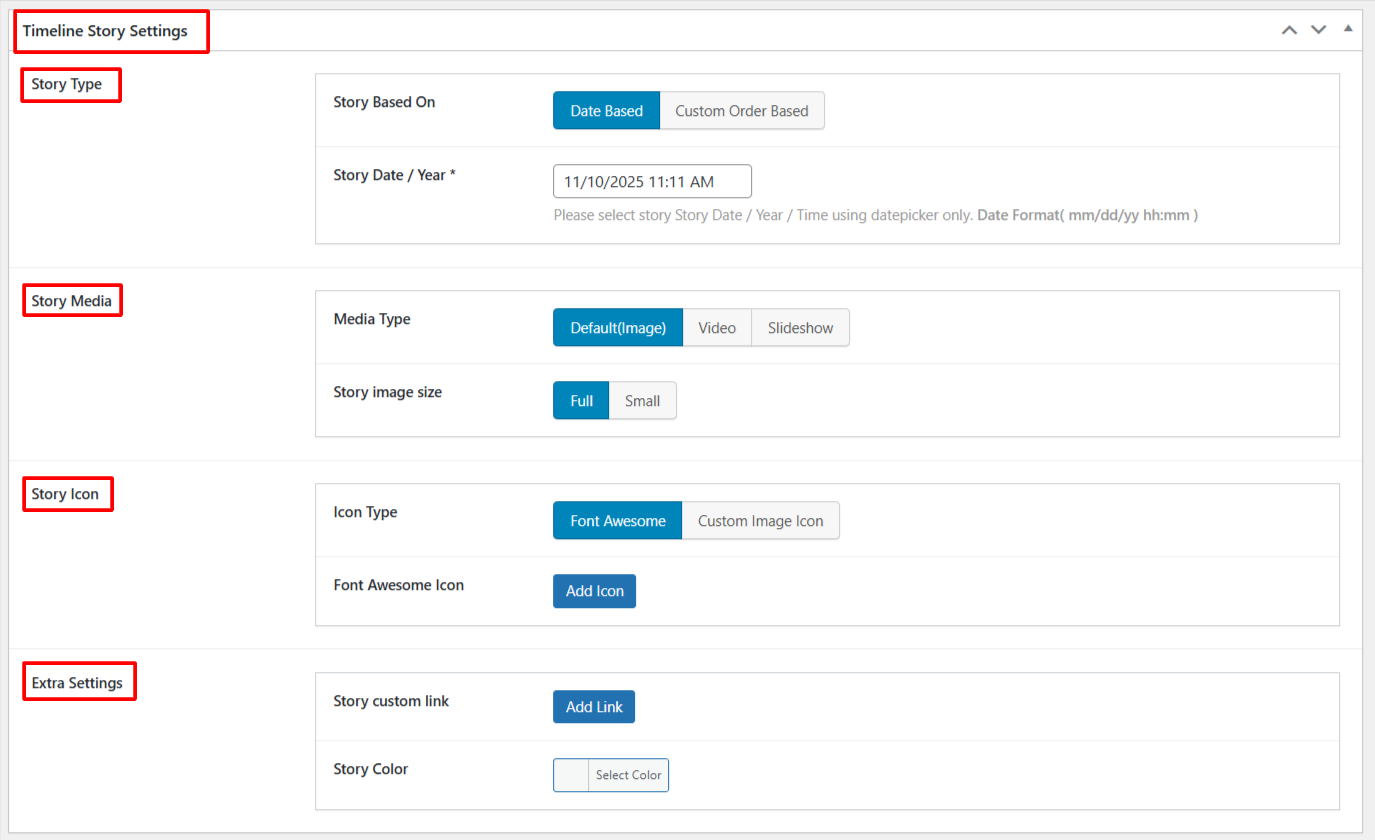
- Story Type: Choose how the story should be ordered on the timeline. You can select:
- Date-Based: Use this option when your timeline events have actual dates.
- Custom Order Based: Use this option when you want to use custom labels instead of dates (like: Phase 2, Launch, or 1302 BC).
- Story Date/Year: Set the date and time for the timeline story.
- Add Sublabel: Add a short label below or alongside the story date.
- Story Media: Choose to display an image, video, or slideshow for your timeline story and set the media size according to your preferences.
- Story Icon: Choose the icon type for your timeline stories.
- Extra Settings: Add the custom story link and set the color for your story.
Similarly, create other timeline stories.
Add Timeline Shortcode
Follow the steps below to start creating your timeline stories via shortcode using Cool Timeline:
- Open any page or post in the Gutenberg editor.
- Click on the “+” Add Block button.
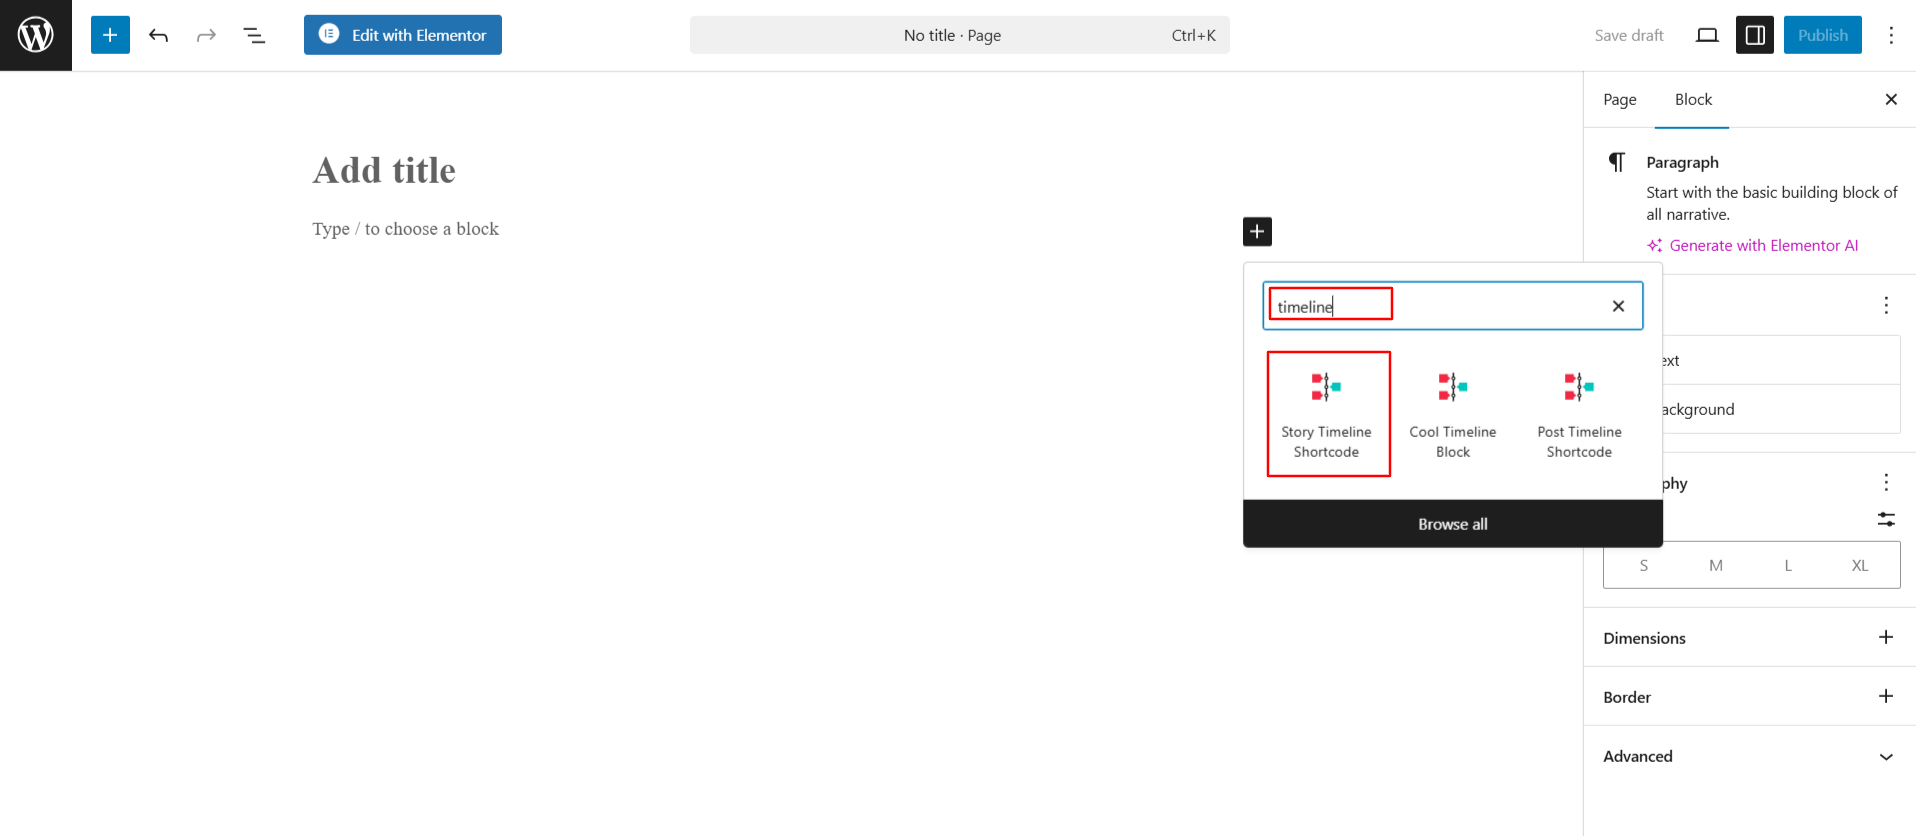
- Search for “Timeline Shortcode” and select the Story Timeline Shortcode.
- The shortcode will be added to your page.
- After adding the timeline shortcode to your page, you can fully customize the display of the timeline using the following settings.
Layout Settings
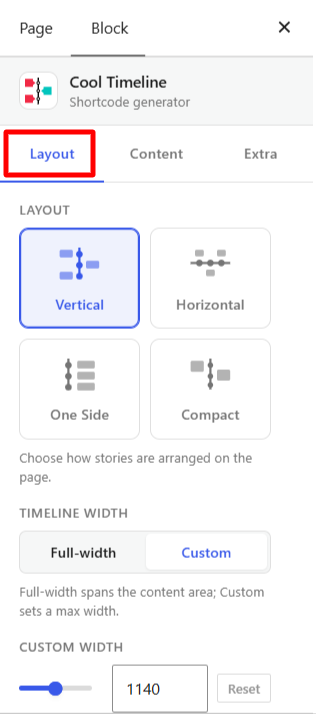
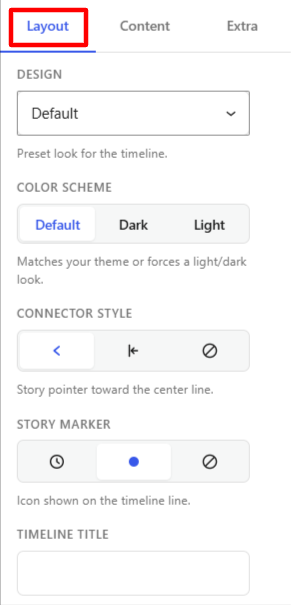
- Layout: Choose a timeline layout from the available options : Vertical, Horizontal, One Side, and Compact.
- Timeline Width: Choose how much space the timeline should use within the content area.
- Custom Width: Set the maximum width of the timeline when Custom width is selected.
- Design: Select from multiple predefined timeline designs to change the visual appearance of your timeline.
- Color Scheme: Choose the color theme for your timeline. You can use the default, dark, or light skin according to your requirements.
- Connector Style: Choose how the story pointers connect to the timeline line.
- Story Marker: Choose the marker displayed on the timeline line for each story.
- Timeline Title: Add a title for the timeline. The title is displayed with the timeline on the page.
Content Settings:
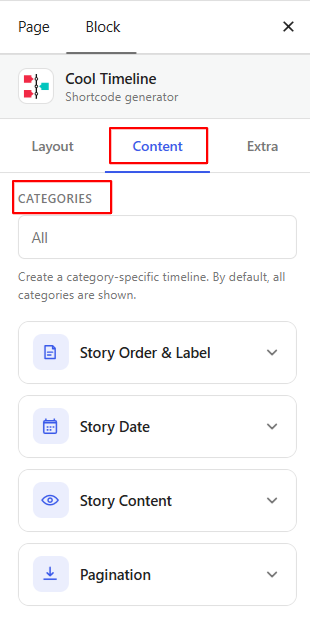
- Categories: Display all timeline stories or choose to display stories from a specific category.
Story Order & Label
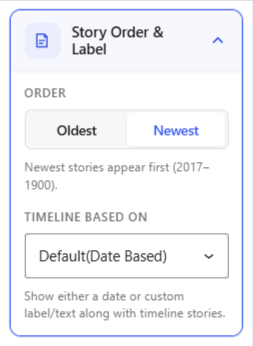
- Order: Choose how your stories appear on the timeline from Oldest or Newest.
- Timeline Based On: Decide whether your timeline should be Date Based (stories shown by date) or use Custom Labels/Text.
Story Date
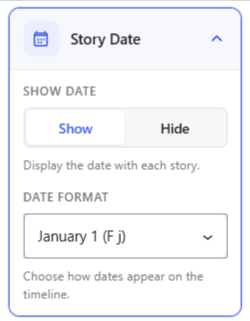
- Show Date: Choose whether to show or hide the date for each story.
- Date Format: Select how the date should appear on your timeline.
Story Content
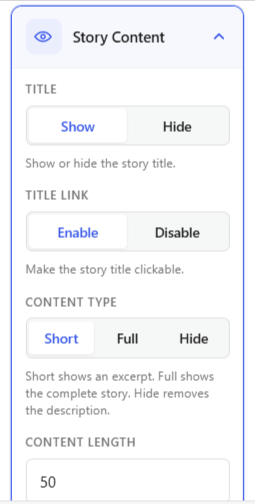
- Title: Choose to show or hide the story title.
- Title Link: Enable or disable the link on the story title.
- Content Type: Choose how much story content to display: Short, Full, or Hide.
- Content Length: Set how much of each story’s text will appear before the “Read More” link.
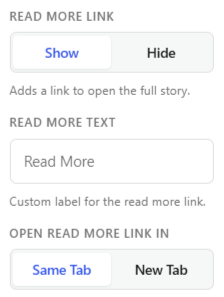
- Read More Link: Show or hide a link to the full story.
- Read More Text: Enter a custom text for the Read More link.
- Open Read More Link In: Choose whether to open the read more link in the Same Tab or a New Tab.
Pagination
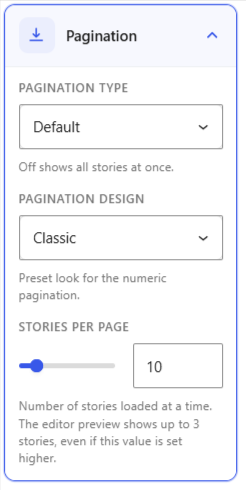
- Pagination Type: Choose how users navigate between multiple pages of stories. You can use the default numbered pagination or enable AJAX “Load More”.
- Pagination Design: Choose a preset design for the pagination controls.
- Stories Per Page: Set the number of stories displayed on each page.
Extra Settings
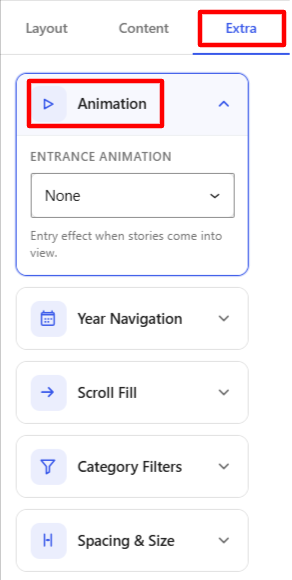
- Animation: Add entrance animation effects like fadeInUp, zoomIn, or slideIn to make timeline stories appear smoothly as users scroll.
Year Navigation
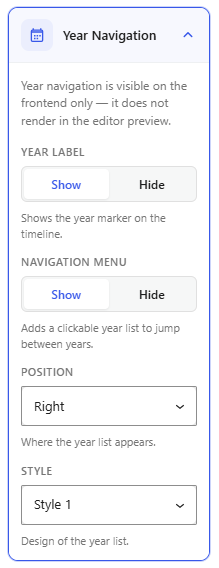
- Year Label Setting: Show or hide the year label display within your timeline.
- Navigation Menu: Show or hide the year navigation bar, allowing users to quickly jump between different years in your timeline.
- Position: Choose where the year navigation menu appears.
- Style: Choose the visual style for the year navigation menu.
Scroll Fill
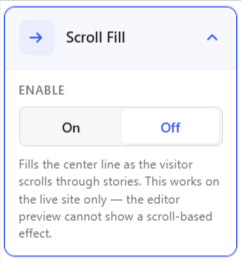
- Toggle this on if you want to fill the center line connecting all stories.
Category Filters
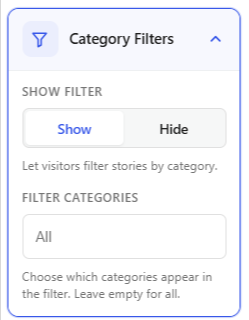
- Show Filter: Choose whether to show or hide filters to let visitors filter stories from specific categories.
- Filter Categories: Display all timeline stories or choose to display stories from a specific category.
Spacing & Size
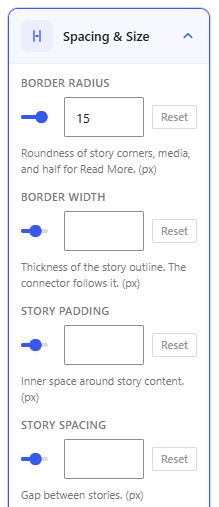
- Border Radius: Set the corner roundness of the story content, media, and Read More elements.
- Border Width: Set the thickness of the story border. The timeline connector uses the same border width.
- Story Padding: Set the inner spacing around the story content.
- Story Spacing: Set the space between individual timeline stories.
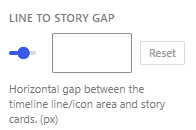
- Line to Gap Story: Set the horizontal space between the timeline line or icon area and the story cards.
Image Settings
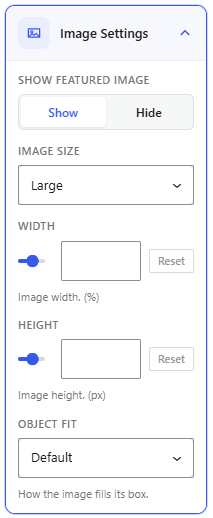
- Show Featured Image: Choose whether to display the featured image with each story.
- Image Size: Choose the WordPress image size to use for the featured images, such as Large.
- Image Width: Set the width of the featured image as a percentage of its available space.
- Image Height: Set the height of the featured image.
- Object Fit: Choose how the featured image fits within its image container.
Publish the Page
- After satisfied with all the changes, click Publish.
- Then preview your page to see your timeline layout.
If you do not prefer using the Timeline Shortcode, Cool Timeline Pro also provides a dedicated Gutenberg Timeline Block. You can add the timeline directly in the WordPress Block Editor and customize it using the available block settings.
To learn how to create a timeline using the Gutenberg block, follow this guide: