By default, WPBakery Page Builder doesn’t have any built-in option to create a timeline.
However, with the help of the Cool Timeline plugin, you can easily add beautiful and responsive timelines directly inside your pages using WPBakery Page Builder.
With Cool Timeline, you can:
- Create your own timeline stories to display company history, achievements, or life events.
- Display your WordPress posts in a timeline layout (called Post Timeline).
Default Timeline Stories
Follow the steps below to add timeline stories inside WPBakery Page Builder:
- From your WordPress dashboard, navigate to the pages section.
- Open your page with WPBakery Page Builder.
- Click the + Add Element button.
- Search for Cool Timeline and select Cool Timeline Default.
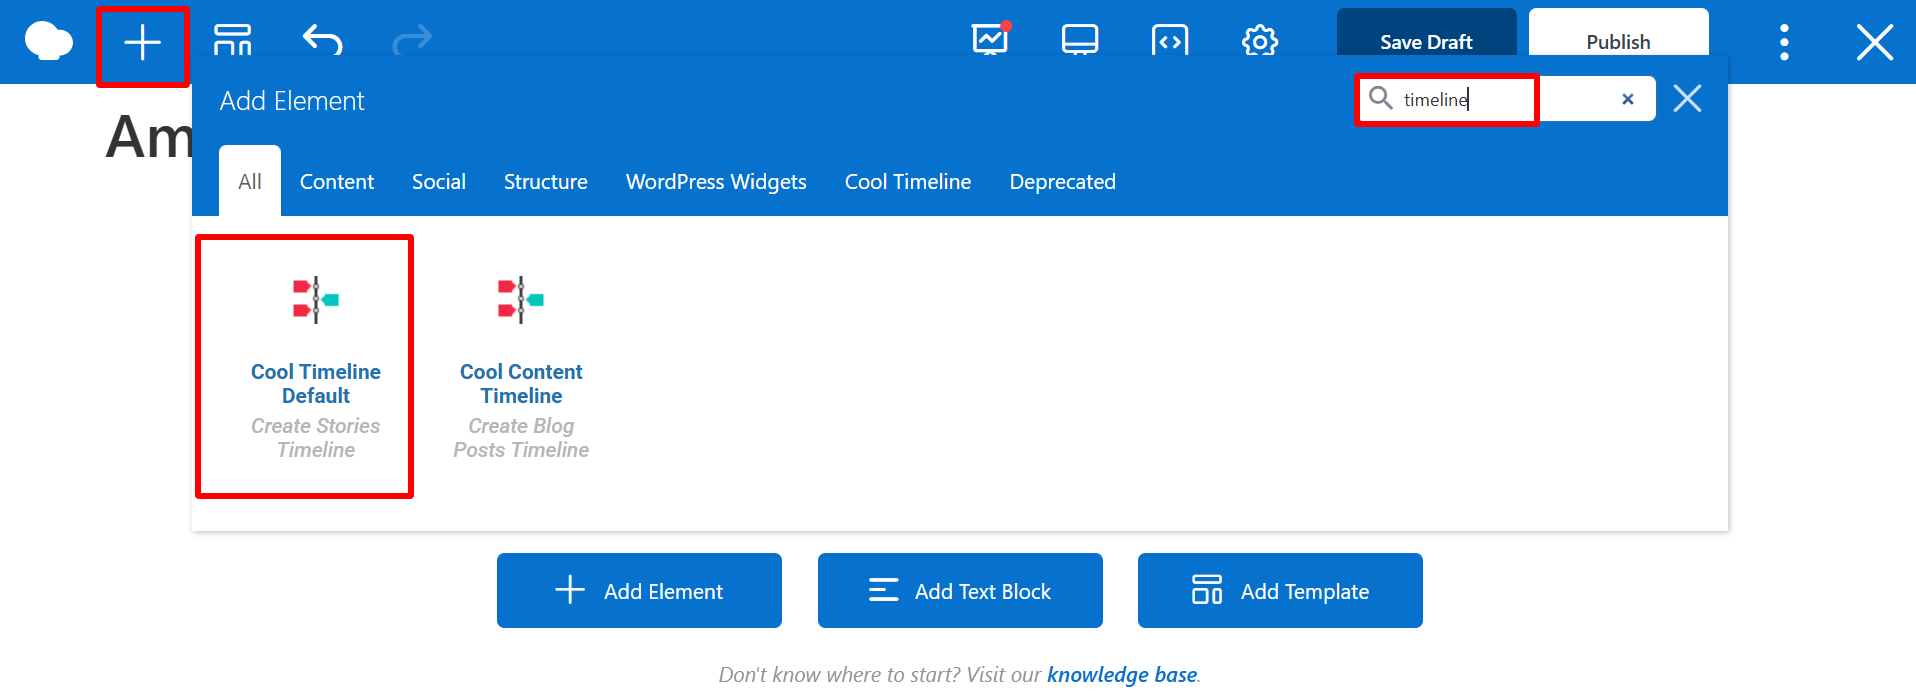
- Cool Timeline settings pop-up panel will open. You can customize your timeline layout using the following settings.
From General Settings,
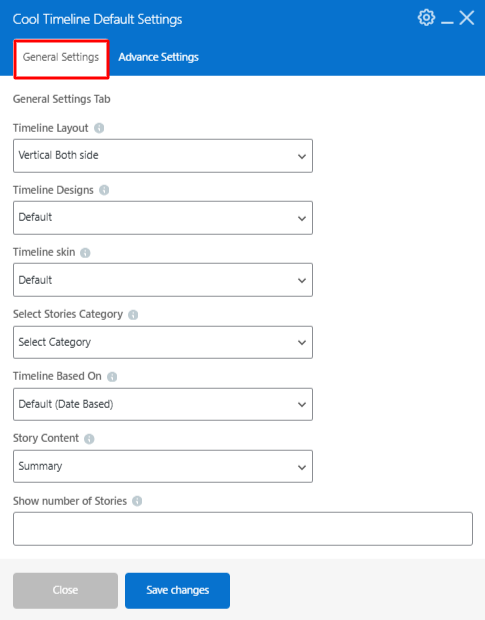
- Timeline Layout: Choose a layout for your timeline story.
- Timeline Design: Select from multiple predefined timeline designs to change the visual appearance of your timeline.
- Timeline Skin: Set the color scheme of your timeline. You can choose Default, Light, Dark, or Colorful styles depending on your site design.
- Stories Category: Select a specific story category to display only the stories that belong to that category. This helps when creating multiple timelines.
- Timeline Based On: Decide whether your timeline should be Date Based (stories shown by date) or use Custom Labels/Text.
- Stories Content: Choose between Summary (short description) or Full (complete story content with formatting) for displaying story content.
- Show Number of Stories: Set the number of stories to display per page. If you have more stories than this number, pagination will appear automatically.
From Advance Settings,
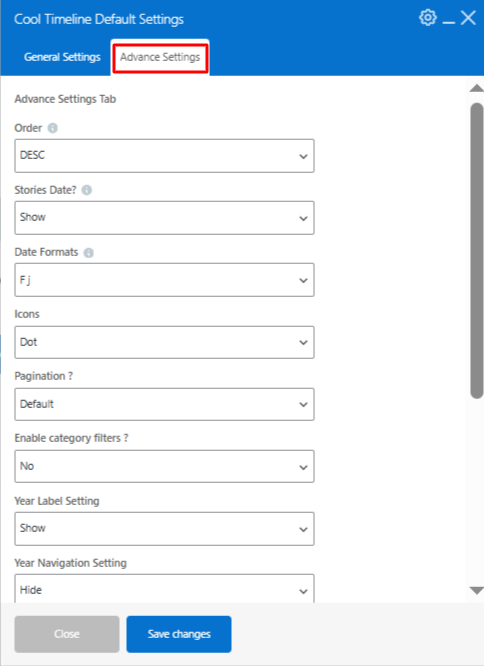
- Order: Choose the order in which your timeline stories appear, from ASC or DESC.
- Stories Date: Set how the timeline date should appear. You can use the default or choose a custom date format.
- Date Format: Choose the desired date format for your timeline stories.
- Icons: Highlight events using custom icons or simple dots.
- Pagination: Add default pagination or “load more” buttons to easily manage timelines with many stories.
- Category Filters: Enable or disable filters to let visitors filter stories from specific categories.
- Year Label Setting: Enable or disable the year label display within your timeline.
- Year Navigation Setting: Show or hide the year navigation bar, allowing users to quickly jump between different years in your timeline.
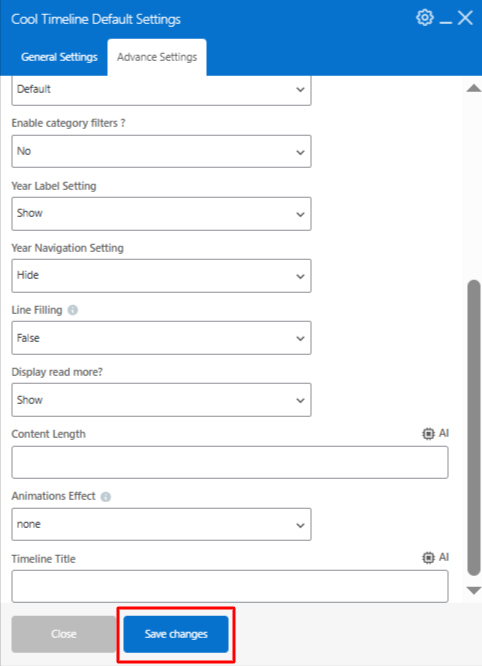
- Line Filling: Choose whether you want to fill the center line connecting all stories or not.
- Display Read More: Choose whether to show the “Read More” link for each story.
- Content Length: Set the number of characters or words to display from each story’s content.
- Animation: Add entrance animation effects like fadeInUp, zoomIn, or slideIn to make timeline stories appear smoothly as users scroll.
- Timeline Title: Add a custom title above your timeline. Leave it blank if you prefer not to display any title.
- Click Save Changes. Timeline will be added to your page.
Post Timeline Stories
If you want to display your blog posts or custom post types in a timeline, follow these steps:
- From your WordPress dashboard, navigate to the pages section.
- Open your page with WPBakery Page Builder.
- Click the + Add Element button.
- Search for Cool Timeline and select Cool Content Timeline.
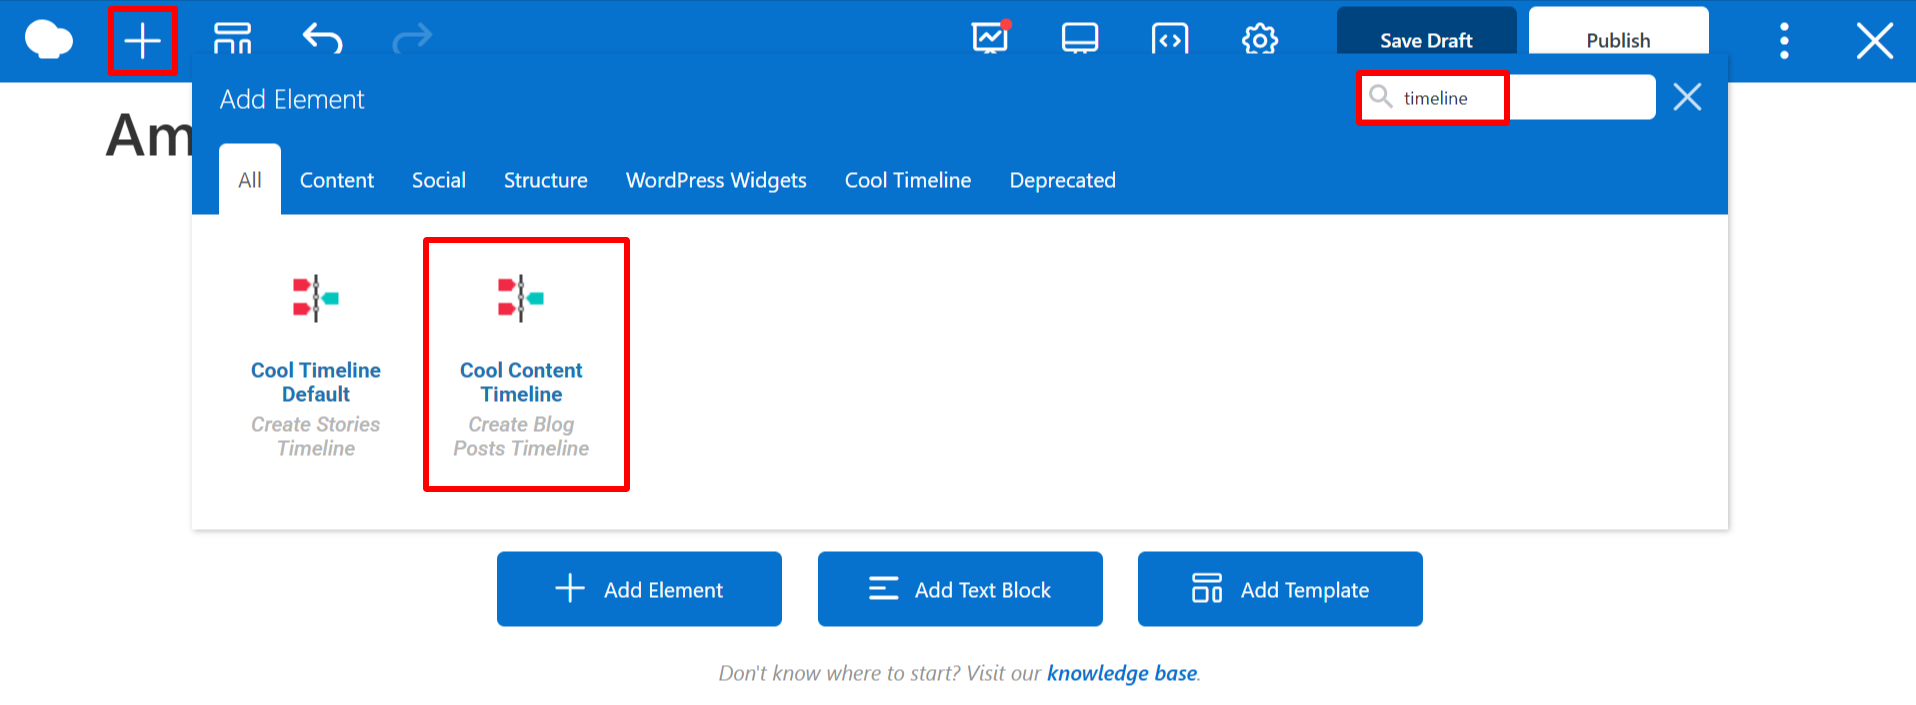
- Cool Timeline settings pop-up panel will open. You can customize your timeline layout using the following settings.
From General Settings,
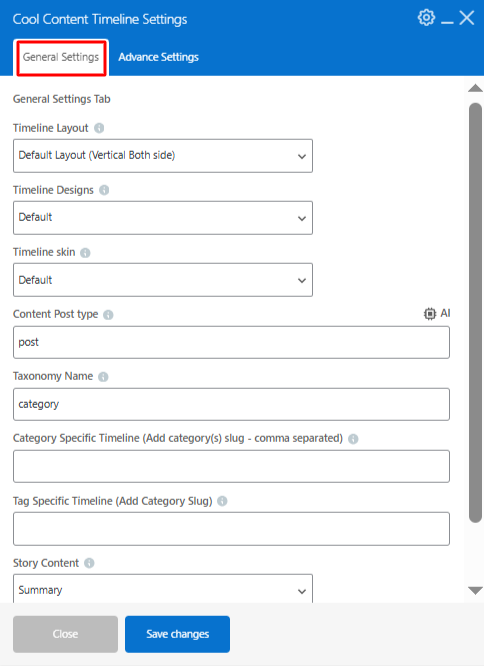
- Timeline Layout: Choose a layout for your timeline story.
- Timeline Design: Select from multiple predefined timeline designs to change the visual appearance of your timeline.
- Timeline Skin: Set the color scheme of your timeline. You can choose Default, Light, Dark, or Colorful styles depending on your site design.
- Content Post Type: Define the content type of your timeline (like Posts).
- Taxonomy Name: This option lets you choose which type of content group you want to display in your post timeline.
- Specific Category: Choose specific categories whose posts you want to display in the timeline.
- Specific Tags: Choose specific tags whose posts you want to display in the timeline.
- Story Content: Select whether you want to show a short summary or the full story content inside each timeline item.
From Advance Settings,
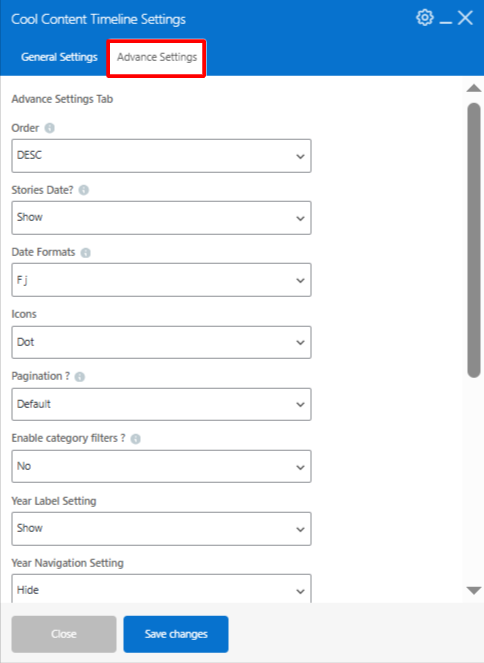
- Order: Choose the order in which your timeline stories appear, from ASC or DESC.
- Stories Date: Set how the timeline date should appear. You can use the default or choose a custom date format.
- Date Format: Choose the desired date format for your timeline stories.
- Icons: Highlight events using custom icons or simple dots.
- Pagination: Add default pagination or “load more” buttons to easily manage timelines with many stories.
- Category Filters: Enable or disable filters to let visitors filter stories from specific categories.
- Year Label Setting: Enable or disable the year label display within your timeline.
- Year Navigation Setting: Show or hide the year navigation bar, allowing users to quickly jump between different years in your timeline.
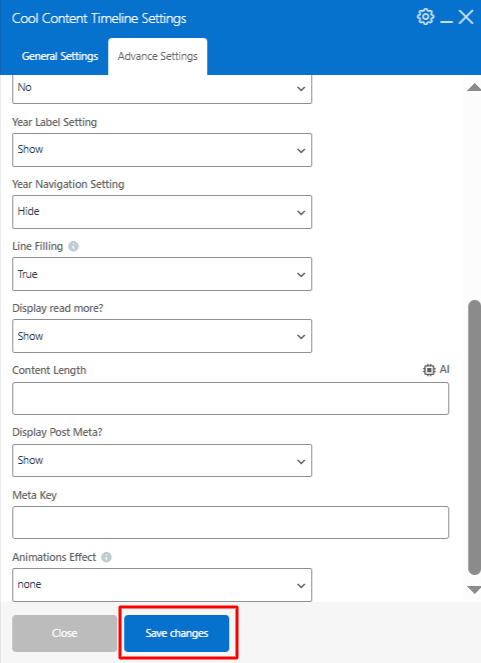
- Line Filling: Choose whether you want to fill the center line connecting all stories or not.
- Display Read More: Choose whether to show the “Read More” link for each story.
- Content Length: Set the number of characters or words to display from each story’s content.
- Display Post Meta: Choose whether you want to show or hide post meta information.
- Animation: Add entrance animation effects like fadeInUp, zoomIn, or slideIn to make timeline stories appear smoothly as users scroll.
- Click Save Changes. Timeline will be added to your page.